

If your AP team is still keying invoices into NetSuite by hand after you paid for Bill.com, you’re not getting the automation you were promised. A bill.com netsuite integration should sync vendors, invoices, and payment status in both directions, but most companies only get it half connected, which means someone is still reconciling two systems every week.
This guide walks through exactly how to set up the bill.com netsuite integration so invoices flow into NetSuite automatically, payments post back without manual journal entries, and your GL stays accurate in real time. We’ll cover the native connector versus third-party middleware options, the field mapping decisions that trip up most finance teams, and the approval workflow settings that actually save time instead of adding another layer of clicks.
We’ve rescued enough failed NetSuite ERP integrations to know where this one usually breaks: sync errors on multi-subsidiary setups, duplicate vendor records, and payment timing mismatches that throw off your cash position. You’ll get a step-by-step setup process along with the specific configuration checks that prevent those problems before they cost you a month-end close.
What you need before connecting Bill.com and NetSuite
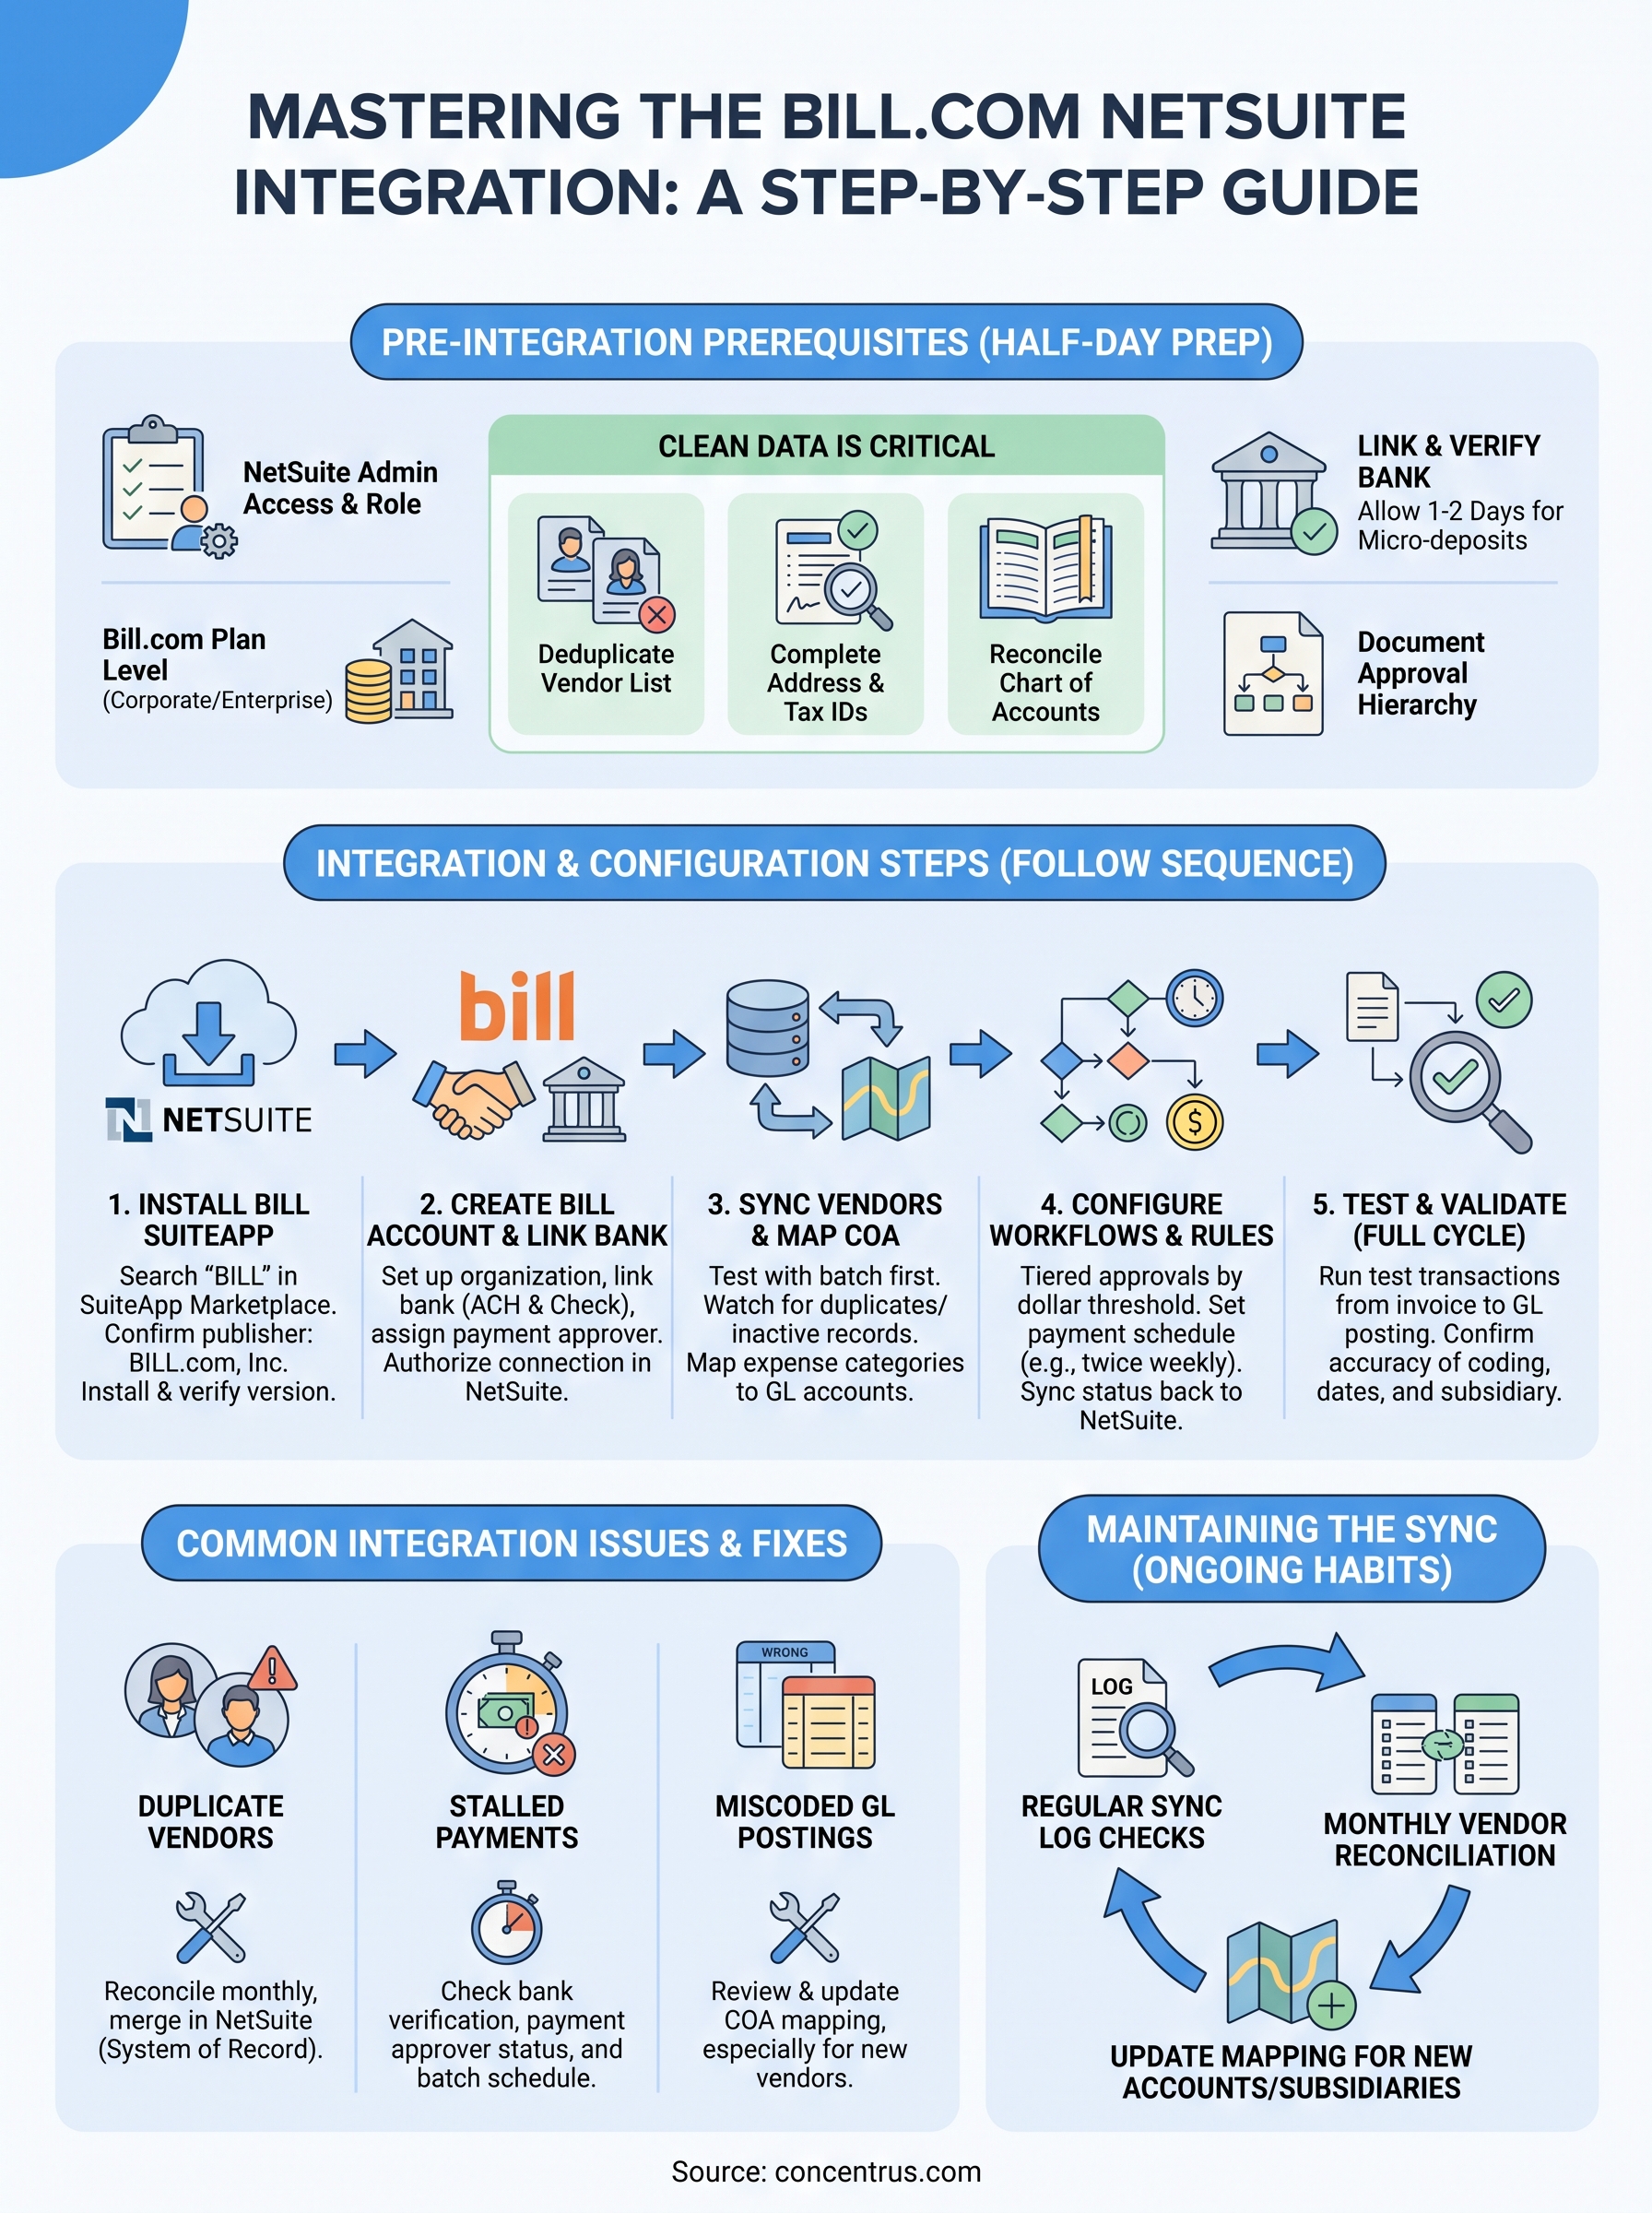
Before you touch a single setting, get your prerequisites in order. Most failed bill.com netsuite integration projects don’t fail during setup, they fail because someone skipped a cleanup step or didn’t have the right permissions lined up beforehand. Give yourself a half day to work through this checklist and you’ll save a full week of troubleshooting later.
NetSuite account and role requirements
You need administrator access in NetSuite to install the SuiteApp and configure custom fields. If you’re a CFO or controller without admin rights, loop in your NetSuite administrator or your Concentrus implementation partner early, since permission requests inside larger organizations can take days to process. Multi-subsidiary companies on OneWorld need to confirm which subsidiaries will actually sync with Bill.com, because trying to connect all of them at once is the fastest way to create duplicate vendor records.
| Requirement | Minimum Level | Why It Matters |
|---|---|---|
| NetSuite role | Administrator | Needed to install SuiteApp and edit field mappings |
| NetSuite edition | Standard or OneWorld | Bundle affects multi-subsidiary sync options |
| Bill.com plan | Corporate or higher | Lower tiers lack full API sync features |
| Bank connection | Verified business account | Required for ACH and check payment sync |
| Vendor records | Deduplicated | Prevents mismatched invoice posting |
Bill.com account and plan level
Check your Bill.com subscription tier before you start, because the Essentials plan doesn’t support the same API-level sync as Corporate or Enterprise plans. If you’re paying for Bill.com already but never upgraded when you added the NetSuite connection, you’re likely missing features like custom approval routing or multi-entity support. Confirm your plan level in the Bill.com admin settings, and upgrade before installation if needed rather than discovering the gap mid-setup.
Clean up your chart of accounts and vendor list first
This is the step almost everyone skips, and it’s the one that causes the most post-launch headaches. If your NetSuite vendor list has duplicates, inactive records mixed with active ones, or vendors missing tax ID information, the sync will either fail silently or create new duplicate records in Bill.com. Pull a vendor list export from NetSuite and review it against your Bill.com vendor list side by side before you connect anything.
A messy vendor list before integration becomes a permanently messy vendor list after integration, just automated.
Run through this checklist before moving to installation:
- Export your full vendor list from NetSuite and flag duplicates or inactive vendors
- Confirm every active vendor has a complete address and tax ID on file
- Reconcile your chart of accounts so expense categories match what Bill.com expects to map against
- Close out any open bills in NetSuite that predate your cutover date so you’re not syncing half-paid invoices
- Document your approval hierarchy on paper first, since you’ll need it for workflow configuration in Step 4
Decide between the native connector and middleware
NetSuite offers the official BILL SuiteApp for direct integration, but some companies with complex multi-entity structures or custom approval logic use middleware like Celigo instead. The native connector handles standard AP workflows well and costs less to maintain, while middleware gives you more control over field-level transformations if your business rules don’t fit the default mapping. For most midsized companies without unusual multi-subsidiary complexity, the native SuiteApp covers everything you need, and that’s the path this guide follows starting with the next step.
Step 1. Install the BILL SuiteApp in NetSuite
Once your prerequisites are locked down, installing the SuiteApp itself takes about fifteen minutes. Log into NetSuite with your administrator role and head to the SuiteApp Marketplace, where you’ll search for the official BILL connector rather than a third-party clone. Skipping this step and manually building custom fields to mimic the integration is a mistake we see constantly during ERP rescues, and it always costs more time to unwind than the install would have taken.
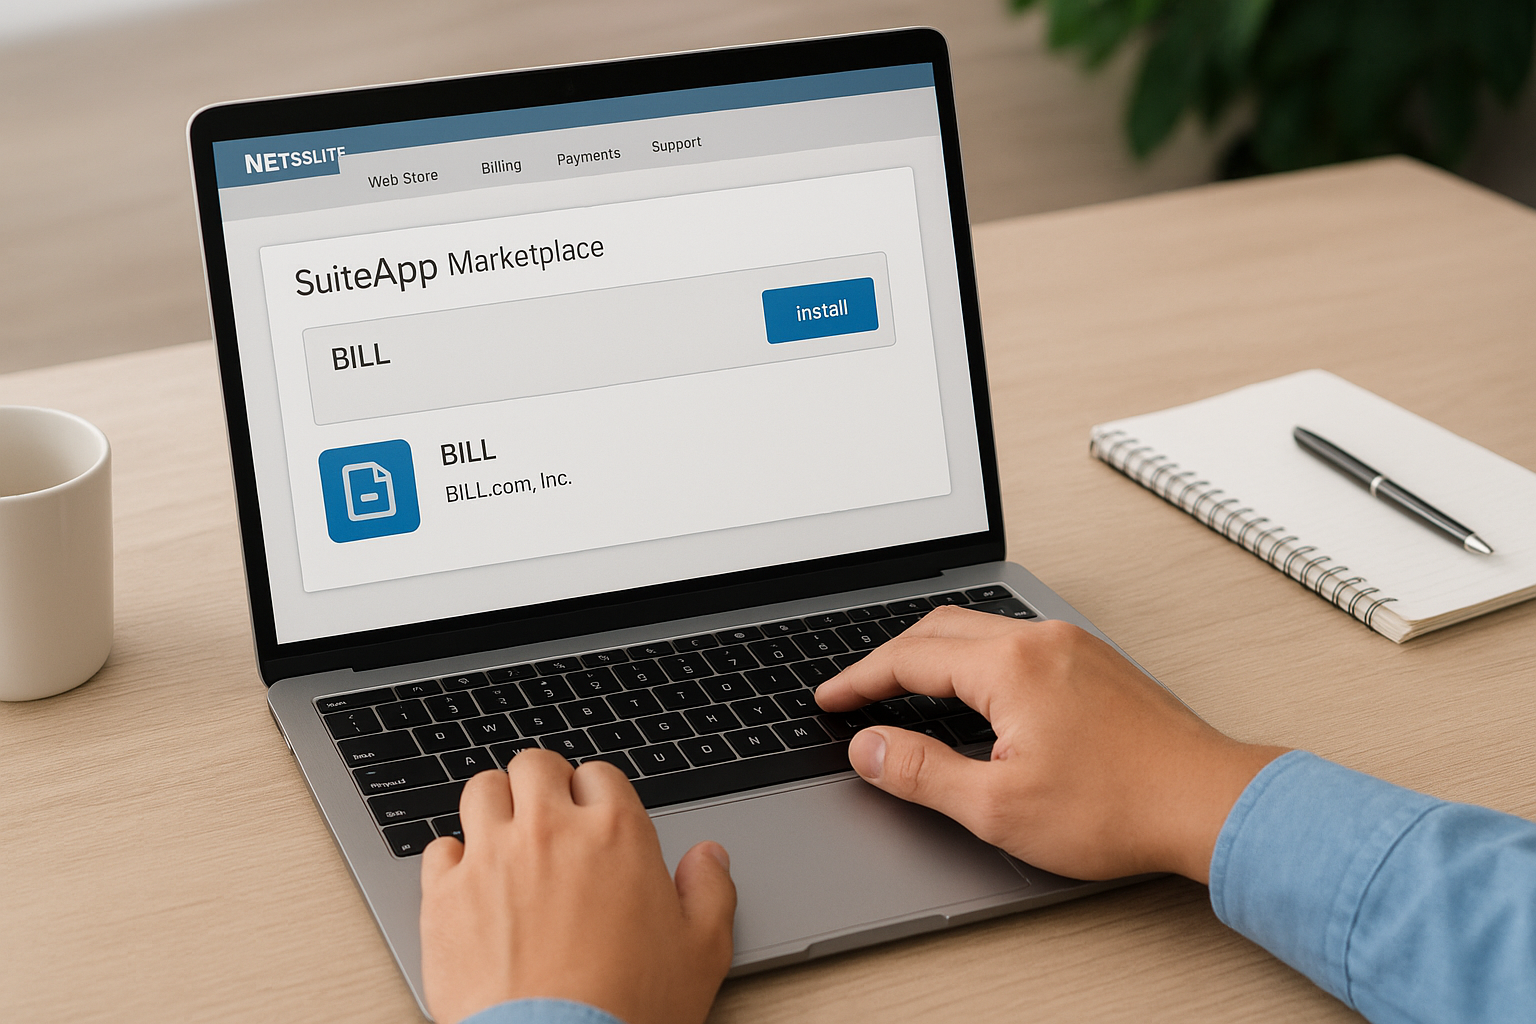
Find and install the correct SuiteApp
Search results sometimes show older or deprecated versions of the connector, so confirm you’re grabbing the current release before clicking install. Follow this sequence exactly:
- Navigate to Customization > SuiteBundler > Search & Install Bundles
- Search for “BILL” (formerly listed as Bill.com)
- Confirm the publisher is BILL.com, Inc., not a third-party reseller
- Click Install and accept the license agreement
- Wait for the installation status to show “Installed” before proceeding
Installing the wrong or outdated bundle version is the single most common reason a bill.com netsuite integration fails before it even starts syncing.
Set permissions and access after installation
After installation completes, NetSuite creates several new custom records, saved searches, and a permission set specific to the SuiteApp. Grant access only to the roles that actually need it, typically your AP clerk, controller, and whoever manages vendor records. Over-permissioning at this stage creates an audit trail headache later, especially for companies in regulated industries where segregation of duties matters to your auditors.
Verify the installation before moving on
Before you touch the Bill.com side of the setup, confirm the SuiteApp installed cleanly. Check the Installed Bundles list under Customization to verify the version number matches what BILL.com currently publishes, and look for any error flags in the installation log. Testing this now, rather than after you’ve already connected your bank account in Step 2, saves you from troubleshooting two systems at once when something goes wrong. If the bundle shows partial installation or missing dependencies, uninstall and reinstall rather than trying to patch around it, since partial installs tend to cause silent sync failures that don’t surface until your first invoice batch runs through weeks later.
Step 2. Create your BILL account and link your bank
With the SuiteApp installed, you now need a live BILL account with a verified bank connection before any data can flow between the two systems. Skip the bank verification step and you’ll end up with invoices syncing correctly but payments stuck in limbo, which is exactly the kind of half-working setup that erodes trust in the whole project. Budget a full business day for this step, mostly because bank verification isn’t instant.
Set up your BILL organization profile
If you don’t already have an active BILL account, create one and select the Corporate or Enterprise plan tier you confirmed in the prerequisites section. During setup, BILL asks for your legal entity name, tax ID, and business address, and these need to match your NetSuite subsidiary record exactly. Mismatched entity details are a common reason the sync flags errors later, so double-check spelling and formatting against what’s already in NetSuite before you submit.
Link your bank account for ACH and check payments
Navigate to Settings > Bank Accounts inside your BILL account and add your primary operating account. BILL uses micro-deposit verification for most business banks, which typically takes one to two business days to post, so don’t schedule your go-live for the same day you start this step. Once verified, confirm the account is set as your default payment source, since a missing default causes payment batches to fail silently instead of throwing a visible error.
A bank connection that isn’t fully verified will let invoices sync but block every payment behind the scenes, and you won’t see why until someone asks where the money went.
Configure payment types and funding sources
BILL supports ACH, check, and virtual card payments, and each requires separate configuration. Run through this list before moving on:
- Confirm ACH is enabled and linked to your verified bank account
- Set check payment as a backup method for vendors who don’t accept ACH
- Decide whether you want virtual card payments enabled for eligible vendors, since some finance teams use this to capture rebates
- Assign a payment approver at the BILL account level, separate from NetSuite approval roles
- Test a $1 payment to an internal account before processing real vendor invoices
Confirm the connection handshake
Back in NetSuite, open the BILL SuiteApp settings and enter your BILL organization credentials to authorize the connection. NetSuite will run a handshake test automatically, and you should see a confirmation message within a minute or two. If the handshake fails, it’s almost always because the bank verification hasn’t completed yet on the BILL side, so check there first before assuming NetSuite is the problem.
Step 3. Sync vendors and map your chart of accounts
With the connection authorized, the next move is telling NetSuite and BILL how to talk to each other about vendors and accounts, and this is where most field mapping decisions go wrong. Get this step right and every invoice that flows through afterward posts to the correct GL account automatically. Get it wrong and you’ll spend the next six months manually correcting miscoded expenses every time your controller closes the books.
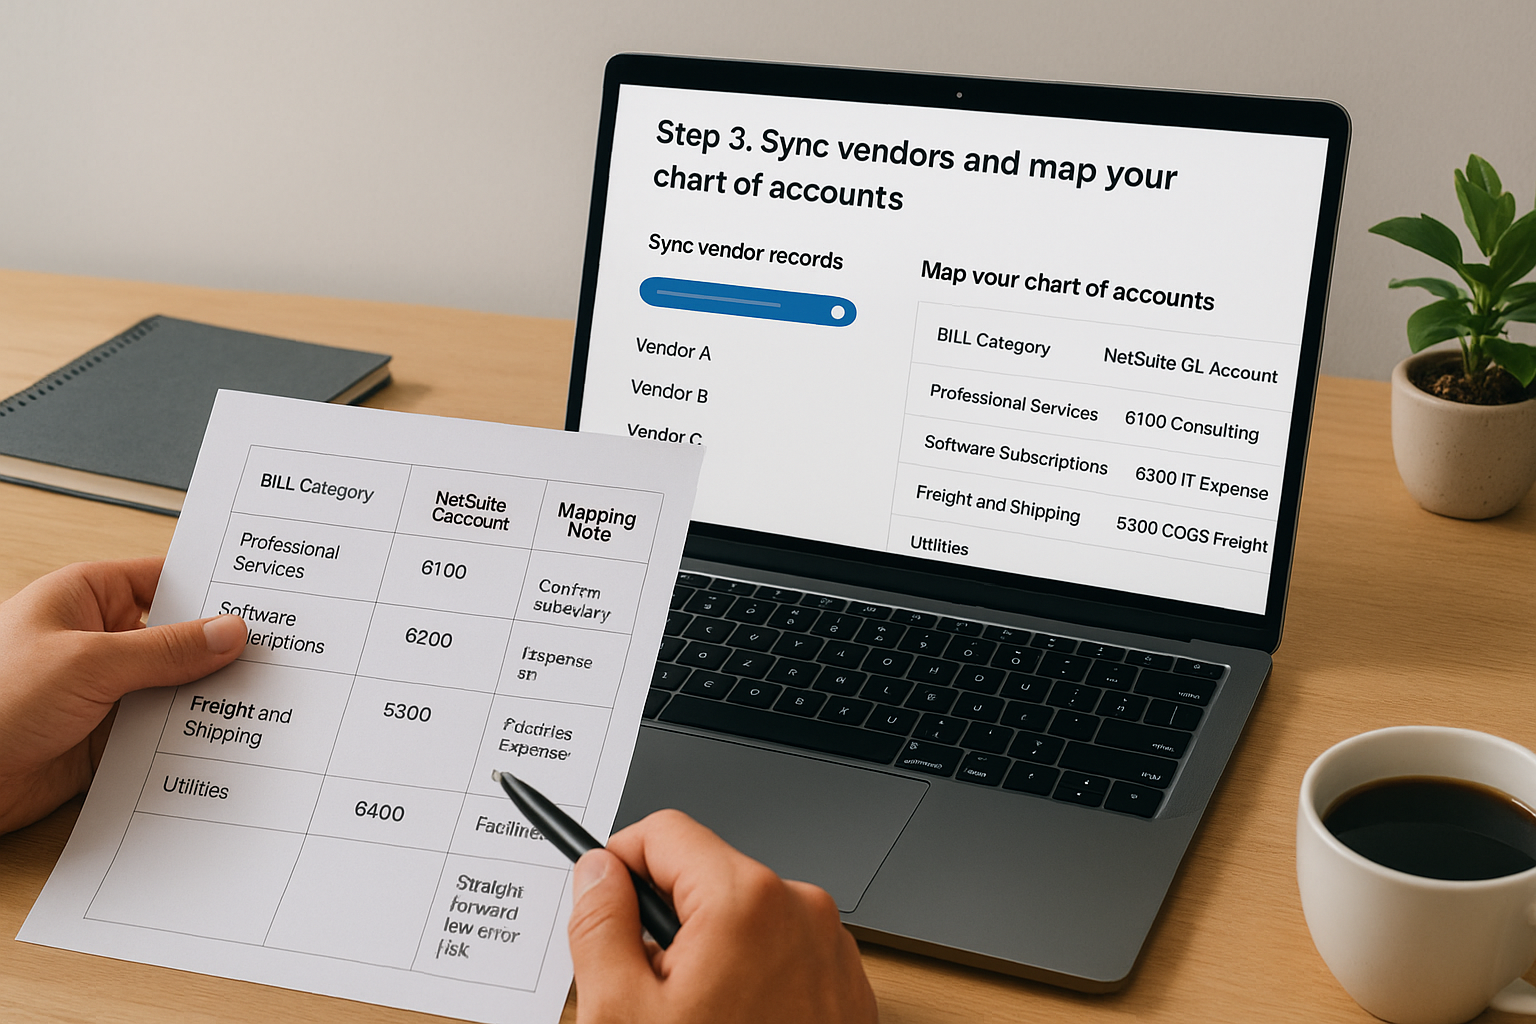
Sync your vendor records
Running the initial vendor sync pulls your NetSuite vendor list into BILL, matching records by tax ID and legal name rather than by internal ID, which is why the cleanup work from your prerequisites checklist matters so much here. Before you run the full sync, test it against a batch of ten vendors first so you can catch mismatches while the fix is still small. Watch for these common sync failures during your test batch:
- Vendors with a tax ID in NetSuite but none in BILL, which creates a duplicate record instead of matching the existing one
- Vendors flagged inactive in one system but active in the other
- Vendor names with abbreviations that differ slightly between systems, like “Inc.” versus “Incorporated”
- Multiple vendor records in NetSuite for the same payee under different subsidiaries
A vendor sync that runs before your vendor list is clean doesn’t fix duplicates, it multiplies them across two systems instead of one.
Map your chart of accounts
Once vendors sync cleanly, move to account mapping, where you’re telling BILL which NetSuite GL account each expense category should post against. This mapping table needs to cover every account category your AP team actually uses, not just the obvious ones like office supplies or utilities.
| BILL Category | NetSuite GL Account | Mapping Note |
|---|---|---|
| Professional Services | 6100 Consulting Expense | Confirm subsidiary-specific sub-accounts if OneWorld |
| Software Subscriptions | 6200 IT Expense | Watch for accounts split by department |
| Freight and Shipping | 5300 COGS Freight | Common source of miscoding without mapping |
| Utilities | 6400 Facilities Expense | Straightforward, low error risk |
Set default mappings for common vendors so your AP clerk doesn’t have to manually classify every invoice line, but leave a review step in place for new vendors until the mapping proves reliable over a few billing cycles.
Step 4. Configure approval workflows and payment rules
Once accounts map cleanly, the next job is building approval rules that actually match how your team signs off on spending, not the generic default that ships with the SuiteApp. This is where the paper hierarchy you documented back in the prerequisites checklist finally gets used, so pull it out before you open any settings. A bill.com netsuite integration that copies your old manual approval chain without adjustment usually just adds a digital layer on top of the same bottleneck, which defeats the point of automating AP in the first place.
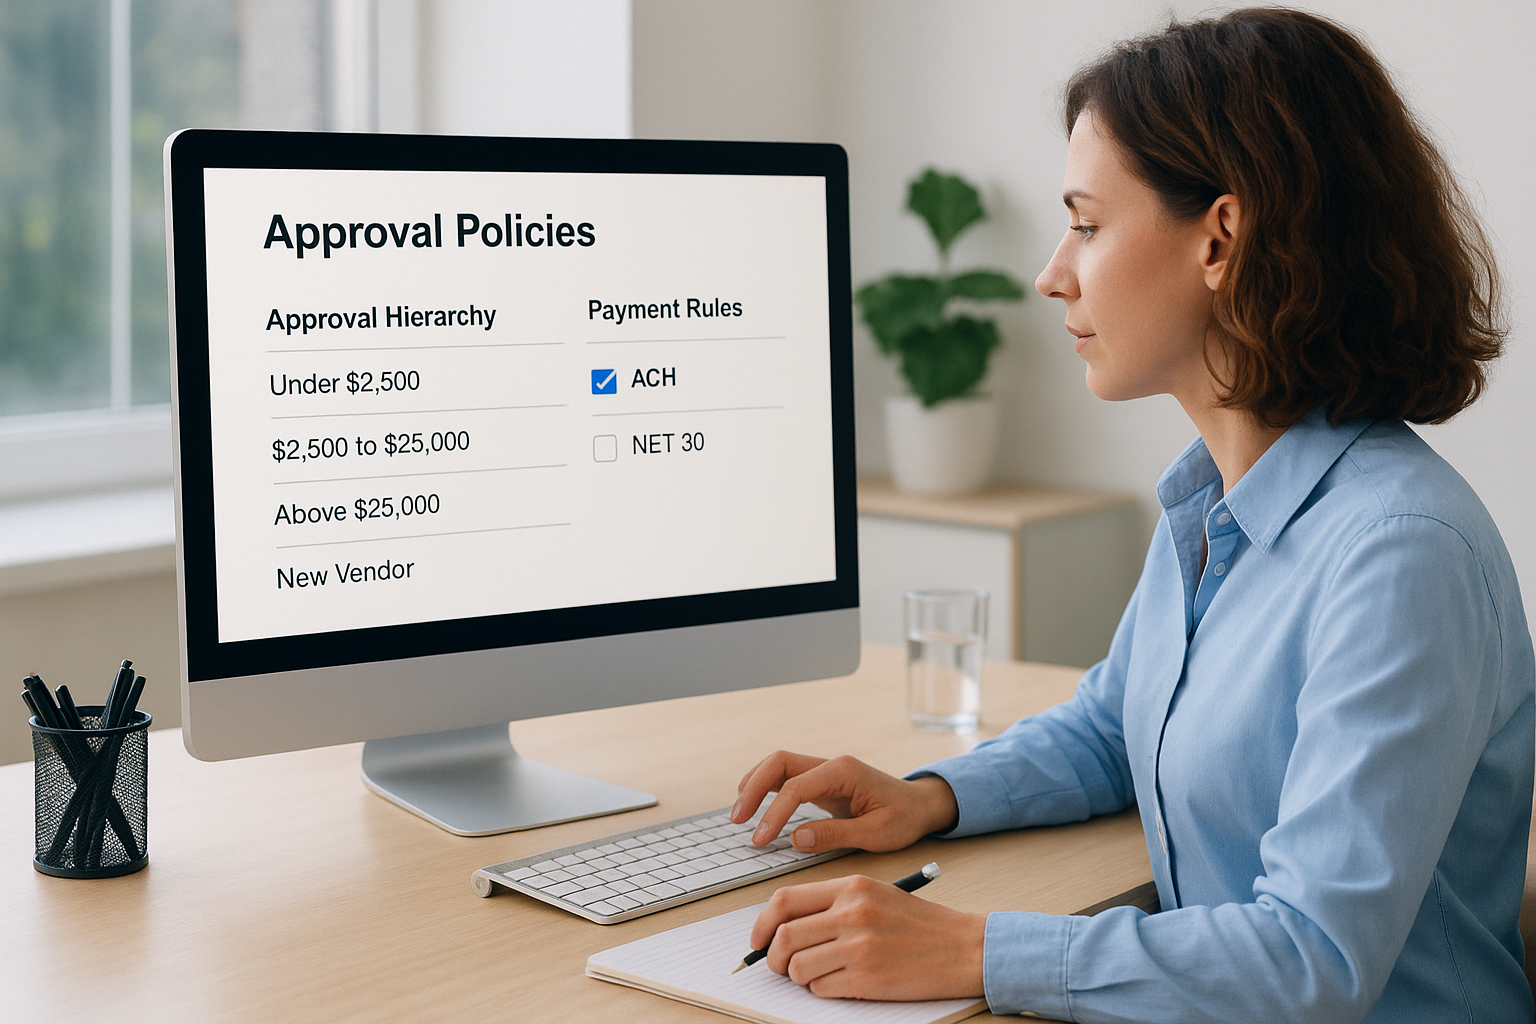
Build your approval hierarchy in BILL
Start in BILL under Settings > Approval Policies, and set thresholds by dollar amount rather than a single blanket rule for every invoice. Most midsized finance teams use a tiered structure: a controller approves anything under a set dollar amount, a CFO or finance director signs off above it, and anything tied to a new vendor requires a second reviewer regardless of amount. Configure this hierarchy exactly:
- Define approval tiers by dollar threshold (example: under $2,500, $2,500 to $25,000, above $25,000)
- Assign named approvers to each tier, not just a role, since generic roles create bottlenecks when someone is out
- Add a mandatory second reviewer for first-time vendors
- Set an automatic escalation rule if an invoice sits unapproved for more than 48 hours
The goal of an approval workflow isn’t more control, it’s the right amount of control at the right dollar threshold, so anything below that line should move without a human touching it.
Set payment rules that match your cash position
Beyond who approves what, decide how and when payments actually release. Configure payment batching so ACH runs on a fixed schedule, like twice weekly, rather than triggering the moment an invoice clears approval, since that keeps your treasury team in control of cash timing instead of letting BILL dictate it. Vendors on net-30 terms should have a scheduled payment date tied to the invoice date, not the approval date, or you’ll pay early and lose float you didn’t need to give up.
Sync approval status back to NetSuite
Finally, confirm that approval status updates flow back into NetSuite automatically so your AP clerk isn’t checking two dashboards to know what’s been paid. Test this with one invoice through the full cycle, approval, payment release, and GL posting, before you roll the workflow out to your whole vendor list.
Step 5. Test and validate the integration
Before you let real invoices flow through, run a full test cycle that mimics your actual AP process from start to finish. Skipping this step to save a day almost always costs a week later, because the errors that surface during testing are the same ones that would otherwise show up mid-close when you have no time to chase them.
Run a full transaction cycle test
Pick three vendors, one from each subsidiary if you’re on OneWorld, and push a test invoice through the entire workflow. Confirm each of these checkpoints before moving forward:
- Invoice syncs from NetSuite to BILL within a few minutes of entry
- Approval routing hits the correct tier based on dollar amount
- Payment releases on the scheduled batch date, not immediately on approval
- Payment status and GL posting sync back to NetSuite automatically
- Vendor record stays matched, with no duplicate created in either system
Verify GL posting accuracy
Once your test invoices clear, pull a GL detail report in NetSuite and compare it line by line against what BILL shows as paid. Small mismatches here point to mapping errors from Step 3, not bugs in the connector itself.
| Check | Expected Result | If It Fails |
|---|---|---|
| Account coding | Matches your mapping table | Recheck vendor default mapping |
| Payment date | Matches scheduled batch, not approval date | Review payment rule settings |
| Subsidiary tag | Correct entity on multi-subsidiary invoices | Confirm subsidiary sync scope |
| Vendor match | Single record, no duplicates | Rerun vendor sync test batch |
If your test invoice doesn’t post to the exact GL account you expected, don’t go live until you find out why, because that same gap will repeat on every invoice after it.
Confirm multi-subsidiary behavior
Multi-entity companies should run this test separately for each subsidiary connected to BILL, since approval tiers and payment sources can differ by entity. Testing only one subsidiary and assuming the rest behave the same is a common shortcut that surfaces as a costly surprise during your first multi-entity close.
Get sign-off before rolling out fully
Route your test results to whoever owns the go-live decision, typically your controller or CFO, and get explicit sign-off before opening the integration to your full vendor list. Teams that skip formal sign-off tend to discover configuration gaps live, in front of vendors waiting on payment, which is the worst possible time to troubleshoot.
Common integration issues and how to fix them
Even a clean setup runs into friction once real invoice volume starts flowing, and most of these issues trace back to the same handful of causes. Knowing the fix ahead of time saves you from treating every error as an emergency that needs a support ticket.
Duplicate vendor records reappear after sync
This usually means someone created a vendor manually in BILL instead of letting the sync pull it from NetSuite, or a tax ID field got left blank during onboarding. Run a vendor reconciliation report monthly for the first quarter after go-live, comparing vendor counts between systems, and merge duplicates in NetSuite rather than BILL, since NetSuite is your system of record.
Duplicate vendors don’t fix themselves, and every week you leave them unmerged is another week of invoices posting to the wrong record.
Invoices sync but payments stall
Stalled payments almost always trace back to a bank connection issue, not a NetSuite problem. Check these in order before escalating to support:
- Confirm the bank account still shows “Verified” status in BILL, since re-verification is sometimes triggered by account changes
- Check that the payment approver assigned in Step 2 hasn’t left the company or changed roles
- Look for a flagged vendor, since sanctioned or high-risk vendors get held automatically
- Verify the payment batch schedule hasn’t shifted due to a bank holiday
GL postings land in the wrong account
Miscoded postings point straight back to your chart of accounts mapping from Step 3. New vendors added after go-live default to a generic expense account until someone assigns a specific mapping, so build a weekly review habit for new vendor accounts during your first two months live.
Multi-subsidiary invoices post to the wrong entity
On OneWorld accounts, this happens when a vendor is shared across subsidiaries but the invoice metadata doesn’t carry the subsidiary tag correctly. Confirm the subsidiary field populates at invoice entry in NetSuite, before the sync runs, rather than trying to correct it after the fact in BILL.
Sync errors with no clear cause
When an error message doesn’t point to an obvious fix, check the BILL SuiteApp dashboard inside NetSuite for a sync log first. Most silent failures show up there with a timestamp and error code, even when the front-end error message is vague.
Keeping your AP automation on track
A working bill.com netsuite integration isn’t a one-time install, it’s an ongoing habit of checking vendor sync, mapping accuracy, and approval routing as your business changes. The steps in this guide cover the setup work, but the real payoff comes from catching drift early, before a duplicate vendor or a miscoded expense turns into a month-end scramble. Revisit your chart of accounts mapping whenever you add a new expense category, and rerun a vendor reconciliation any time you onboard a new subsidiary or acquire a company.
Most failed integrations we’re brought in to fix weren’t broken on day one, they drifted for months while nobody checked the sync logs. If your current setup already feels like it’s fighting you instead of saving you time, don’t wait for the next close to force the issue. Talk to Concentrus about a rescue that gets your ERP and AP automation back to actually paying for itself.