

If your finance team still exports Ramp transactions to a spreadsheet before keying them into NetSuite, you already know how much time that wastes and how many errors slip through. A properly configured ramp netsuite integration closes that gap by pushing card transactions, receipts, and reimbursements straight into your general ledger, matched to the right accounts and dimensions without manual entry.
This guide walks through exactly what the netsuite ramp integration does once it’s live and how to set it up correctly the first time. You’ll see how transactions map to your chart of accounts, how the sync handles multi-subsidiary structures, and where teams typically run into trouble with field mapping during setup.
We’ll cover the prerequisites, the connection steps inside both platforms, and the settings that determine whether your spend data lands clean or creates reconciliation headaches down the road. Whether you’re setting this up for the first time or fixing a sync that’s been throwing errors, you’ll walk away with a working integration and a clear picture of what to check before you trust the numbers flowing through it.
What the Ramp-NetSuite integration does and requires
What actually syncs between the platforms
Once connected, Ramp pushes every card transaction, digital receipt, and reimbursement request into NetSuite as a matched, categorized record instead of a line item you have to key in by hand. Each transaction-level detail (merchant, amount, date, card holder, and memo) carries over along with the receipt image attached in Ramp, so your AP team isn’t chasing paper or PDFs during month-end close, which is the same payoff you get from broader NetSuite AP automation tooling. The integration also syncs vendor bills and bill payments if you’re using Ramp Bill Pay and its AP automation features, meaning vendor bills created in Ramp post directly to NetSuite’s accounts payable module rather than requiring a separate export step. Reimbursements follow the same path, landing in NetSuite coded to the employee and expense category you’ve already set up in Ramp’s policy engine.
The integration only saves you time if the mapping behind it is accurate; get that wrong and you’ve automated the creation of bad journal entries.
What you need before you connect anything
Before you touch the connection settings, confirm you have the right access and account structure on both sides. Missing even one of these usually stalls the setup halfway through, so check this list against your current environment first.
| Requirement | Why it matters |
|---|---|
| NetSuite administrator role | Ramp needs elevated permissions to create the integration record and read your chart of accounts |
| Ramp Admin or Bookkeeper role | Only these roles can initiate and authorize the NetSuite connection from Ramp’s side |
| Active NetSuite subscription with SuiteScript/SuiteTalk enabled | The NetSuite SuiteApp that Ramp installs relies on these web services being turned on |
| Chart of accounts finalized | Accounts, classes, departments, and locations should exist in NetSuite before mapping, not created on the fly |
| Ramp corporate card or Bill Pay activated | The sync has nothing to push until spend is flowing through Ramp |
Getting these confirmed ahead of time turns a two-hour setup into a twenty-minute one, and it keeps your NetSuite administrator from fielding permission errors mid-connection.
How subsidiaries and dimensions factor in
Multiple entities change how you configure this integration significantly. If you run NetSuite OneWorld with several subsidiaries, Ramp needs to know which entity each card or user belongs to before it can post transactions correctly, and getting this wrong routes spend to the wrong company’s books. Teams using custom segments, classes, departments, or locations to track spend by project, cost center, or region also need those dimensions built out in NetSuite ahead of time, because Ramp maps to existing values rather than creating new ones. Skipping this step is the single most common reason a ramp netsuite integration produces transactions that land in a generic suspense account instead of the right cost center. If your subsidiary or segment structure is still evolving, it’s worth pausing the integration setup until that structure is stable, since restructuring a subsidiary hierarchy and remapping hundreds of historical transactions later is far more painful than getting it right on day one.

Step 1. Prepare your NetSuite account
Before Ramp shows up as an option in your NetSuite dashboard, someone with administrator rights needs to get the account itself ready. Skipping this groundwork is why so many setups stall out at the connection screen, so treat it as its own task rather than something you rush through on your way to the actual sync.
Install the Ramp SuiteApp
Grant a NetSuite administrator temporary access and have them install the Ramp SuiteApp directly from the SuiteApp bundle or Ramp’s setup wizard. This step provisions the web services and permissions Ramp needs to read and write records in your account.
- Log in to NetSuite as an administrator.
- Confirm that SuiteScript and SuiteTalk (web services) are enabled under Setup > Company > Enable Features > SuiteCloud.
- Install the Ramp bundle when prompted during the Ramp connection flow, or search for it under Customization > SuiteBundler.
- Verify the bundle installed without errors before moving on.
If web services aren’t enabled first, the connection attempt fails silently and you’ll waste time troubleshooting the wrong problem.
Set up the integration user role
Ramp needs a dedicated role with permissions scoped to exactly what it should touch, not a full administrator login shared across tools, so it helps to understand how roles and access control work in NetSuite first. Create a role that can read your chart of accounts and post to accounts payable and the general ledger, but restrict access to payroll, HR records, and anything outside spend management. This limits your exposure if credentials are ever compromised and makes future audits of third-party access far simpler to review.
Confirm your accounting preferences
Check your NetSuite accounting preferences before you connect anything, since Ramp inherits these settings rather than overriding them. Confirm your fiscal calendar, base currency, and multi-currency settings match what you expect, especially if you operate across borders or run several subsidiaries under OneWorld. Also verify that the accounts Ramp will post to, like your corporate card liability account and any clearing accounts for reimbursements, already exist and are active rather than left in a
Step 2. Connect Ramp to NetSuite
Now that your NetSuite account is provisioned, switch over to Ramp and start the connection from that side. Ramp Admins and Bookkeepers are the only roles that can initiate this, so confirm you’re logged in with the right permissions before you begin, or you’ll hit a dead end partway through the wizard, the same discipline that best practices for working with user roles call for on the NetSuite side.
Start the connection in Ramp’s accounting settings
Open Ramp and navigate to Accounting > Accounting Software Integration, then select NetSuite from the list of supported platforms. Ramp will walk you through a short authorization flow that requests access to your NetSuite account using the credentials or token from the SuiteApp you installed in Step 1.
- Go to Accounting > Integrations in Ramp.
- Select NetSuite and click Connect.
- Enter your NetSuite account ID, found under Setup > Company > Company Information.
- Authorize the connection using the integration user role you created earlier, not a personal admin login.
- Wait for Ramp to confirm a successful handshake before moving to mapping.
A clean connection here is what makes every later mapping decision stick, so don’t rush past a failed authorization message just to move forward.
Confirm the handshake and initial sync settings
Once Ramp reports a successful connection, it will pull a snapshot of your chart of accounts, subsidiaries, vendors, and dimensions directly from NetSuite. Review this list against what you expect to see, since a missing subsidiary or an inactive account here usually means something in Step 1 didn’t finish installing correctly. This is also where you set the sync frequency, choosing whether transactions post to NetSuite in real time or in scheduled batches, daily, or on a manual trigger you control from Ramp’s dashboard.
This stage of the ramp netsuite integration is really just plumbing, connecting the pipes so data can flow, but it’s worth testing before you build out detailed mappings on top of it. Push one or two sample transactions through and watch whether they land in NetSuite at all, even if the account coding isn’t right yet. A connection that transmits data successfully, even to the wrong account, tells you the authorization worked and any remaining errors are mapping issues you’ll fix in the next step rather than a broken handshake you’d otherwise waste hours chasing.
Step 3. Map accounts, entities, and custom segments
With the connection live, the real configuration work starts here. Ramp’s default mapping guesses at where transactions should land, but those guesses rarely match how your finance team actually categorizes spend, so plan to spend real time in this screen rather than accepting the defaults and moving on.
Map spend categories to your chart of accounts
Working through Ramp’s category list, assign each spend category (travel, software, office supplies, and so on) to the matching GL account in NetSuite, keeping NetSuite account types in mind as you go. Ramp lets you set these mappings once at the category level so every future transaction in that bucket routes automatically, which is the whole point of the integration. Pay close attention to categories your team splits across multiple accounts, like software subscriptions that sometimes hit a fixed asset account instead of an expense account, since a single blanket mapping will miscode those every time.

| Ramp element | Maps to in NetSuite |
|---|---|
| Spend category | GL account |
| Card or user | Subsidiary |
| Department tag | Department |
| Project or cost center tag | Class or custom segment |
| Location tag | Location |
Assign entities for multi-subsidiary accounts
If you run NetSuite OneWorld, this is where subsidiary assignment decides whose books each transaction hits. Go through each Ramp card and user profile and confirm it’s tied to the correct subsidiary, because a card holder assigned to the wrong entity will post clean-looking transactions to the wrong company’s ledger without throwing an error. Cross-check this list against your HR or org chart data rather than assuming Ramp inherited it correctly from the initial sync.
A transaction that posts to the wrong subsidiary looks fine in Ramp and wrong in NetSuite, which is exactly the kind of error nobody catches until close.
Configure custom segments and dimensions
Beyond standard accounts and subsidiaries, map any custom segments your company uses, whether that’s classes, departments, locations, or a fully custom segment built for project tracking. Ramp reads these values from NetSuite rather than creating them, so if a project code is missing from NetSuite, it simply won’t appear as an option in Ramp’s tagging screen. Confirm with whoever owns your chart of accounts in NetSuite that every active segment value is available before you finalize mapping, since gaps here are the most common cause of the suspense-account problem described earlier.
Step 4. Test the sync and troubleshoot common errors
Before you let the integration run unsupervised, push a batch of real transactions through and watch every step of the journey from Ramp to the NetSuite general ledger. Working from an ERP integration testing checklist now catches mapping gaps while you can still fix them in minutes, rather than after a full month of spend has posted incorrectly across dozens of accounts.
Run a test batch before going live
Select a handful of transactions that represent your riskiest categories, ones that touch multiple subsidiaries, split across GL accounts, or carry custom segment tags, and sync them manually rather than waiting for the scheduled batch.
- In Ramp, trigger a manual sync for five to ten transactions covering different spend categories and at least two subsidiaries if you run OneWorld.
- Open NetSuite and confirm each transaction landed with the correct GL account, subsidiary, and dimension tags.
- Check that receipt images and memos carried over intact, since a missing attachment often signals a permissions gap from Step 1.
- Reconcile the batch total in Ramp against what posted in NetSuite to confirm nothing duplicated or dropped.
Never flip the sync to fully automatic until a manual test batch posts clean, because automation just multiplies whatever mistake you haven’t caught yet.
Common errors and what they mean
Most sync failures trace back to a handful of repeat offenders. Use this table to diagnose quickly instead of guessing.
| Error you see | Likely cause |
|---|---|
| Transaction stuck in “pending” | Missing or inactive GL account mapping |
| Posts to suspense or default account | Custom segment value not built in NetSuite yet |
| Wrong subsidiary on the entry | Card or user profile assigned to incorrect entity |
| Sync fails with a permissions error | Integration role missing access to a specific record type |
| Duplicate entries in NetSuite | Manual and scheduled sync ran on the same batch |
When to call in help
If you’ve worked through this table and transactions still land in the wrong place, the problem usually sits deeper than a single mapping field, often in how your chart of accounts or subsidiary structure was set up before Ramp ever entered the picture. That’s the point where a rescue-style review of your NetSuite configuration pays off faster than more trial and error, since a misaligned account structure will keep breaking every integration you connect to it, not just this one.
Keeping Ramp and NetSuite running smoothly
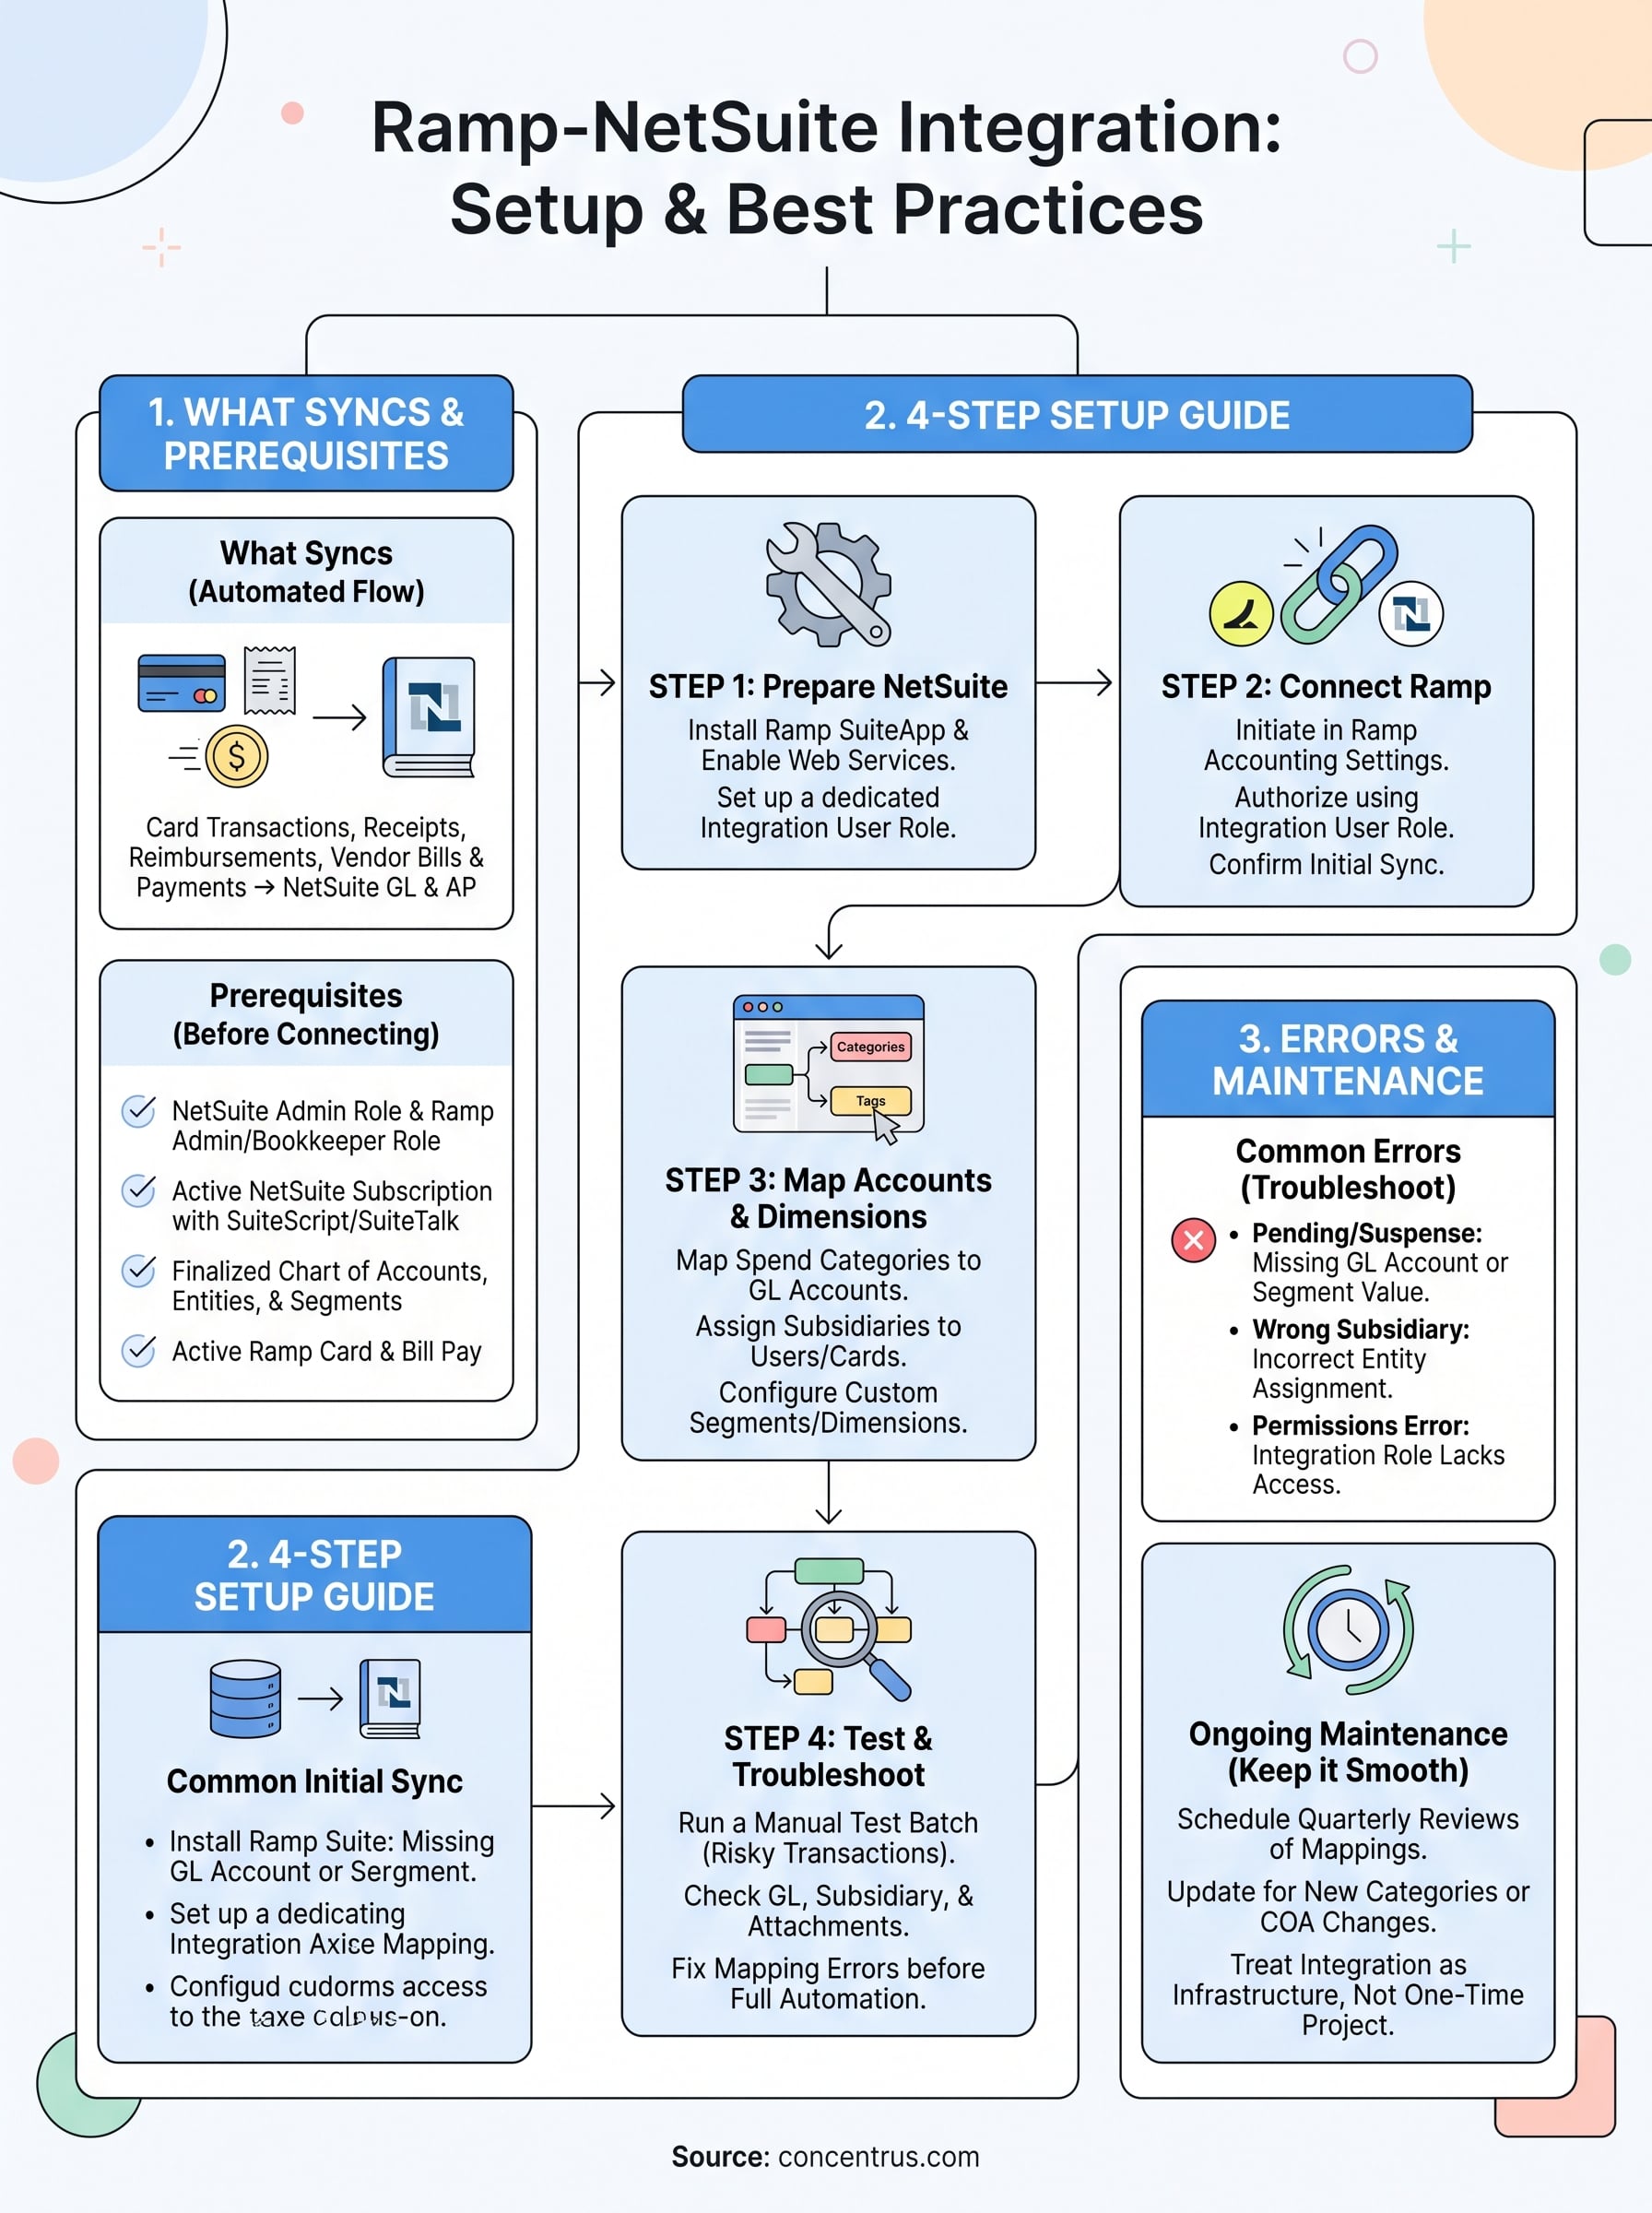
Get the mapping right once and a ramp netsuite integration keeps paying you back every close, no more spreadsheet exports, no more chasing receipts, no more guessing whether a transaction hit the right subsidiary. The setup work upfront, confirming subsidiaries, building out custom segments, testing before you automate, is what separates a sync that saves hours from one that quietly creates cleanup work every month.
Schedule a recurring check, even a quick quarterly review of a sample batch, since new spend categories, new subsidiaries, or a reorganized chart of accounts can all break mappings that worked fine on day one. Treat this integration as infrastructure you maintain, not a project you finish and forget.
If your team is still untangling a netsuite ramp integration that never synced cleanly, or you want the setup done right the first time with ROI built into the plan, talk to Concentrus about our ERP integration services.