
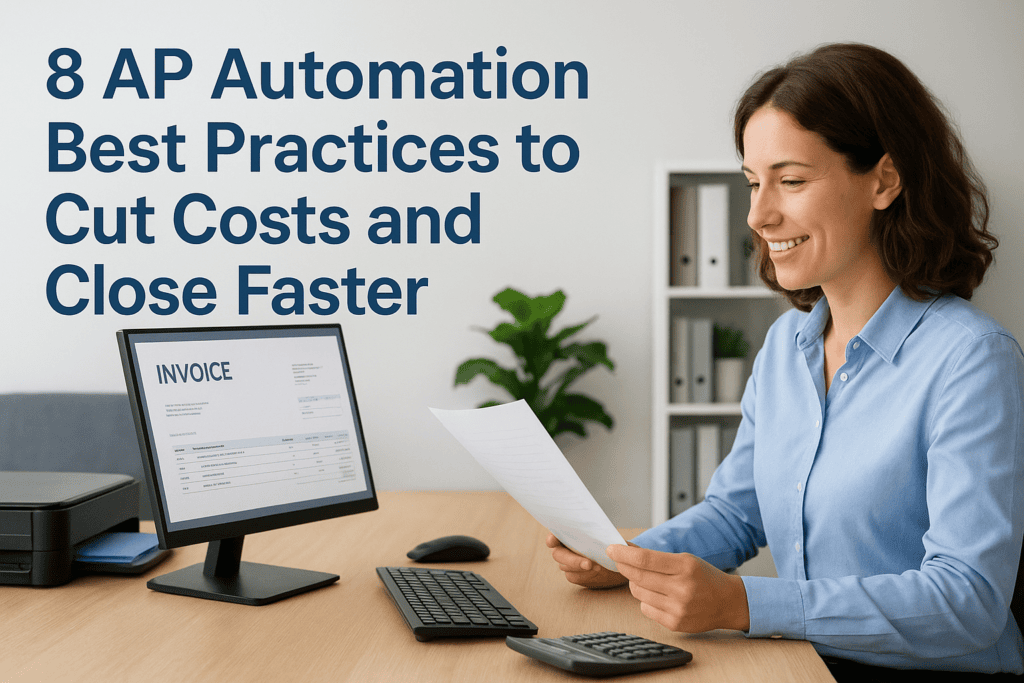
Manual invoice processing costs an average of $10–$15 per invoice. Multiply that across hundreds or thousands of invoices each month, and the drain on your finance team’s time and budget becomes hard to ignore. That’s exactly why AP automation best practices matter, not as a nice-to-have, but as a direct lever for reducing costs and accelerating your monthly close.
Most midsized companies already know AP automation is worth pursuing. The real challenge is doing it well. A rushed or poorly planned rollout creates new headaches: duplicate payments, broken approval chains, reporting gaps, and frustrated teams who revert to spreadsheets. Getting it right from the start requires more than flipping a switch inside your ERP, it takes deliberate alignment between your automation tools and your financial workflows.
At Concentrus, we help CFOs and finance leaders implement and optimize NetSuite and Acumatica ERP systems with measurable ROI built into every phase. AP automation is one of the highest-impact areas we see during implementations, and it’s often where the fastest wins live. This article breaks down eight proven practices that will help you cut processing costs, tighten controls, and close your books faster.
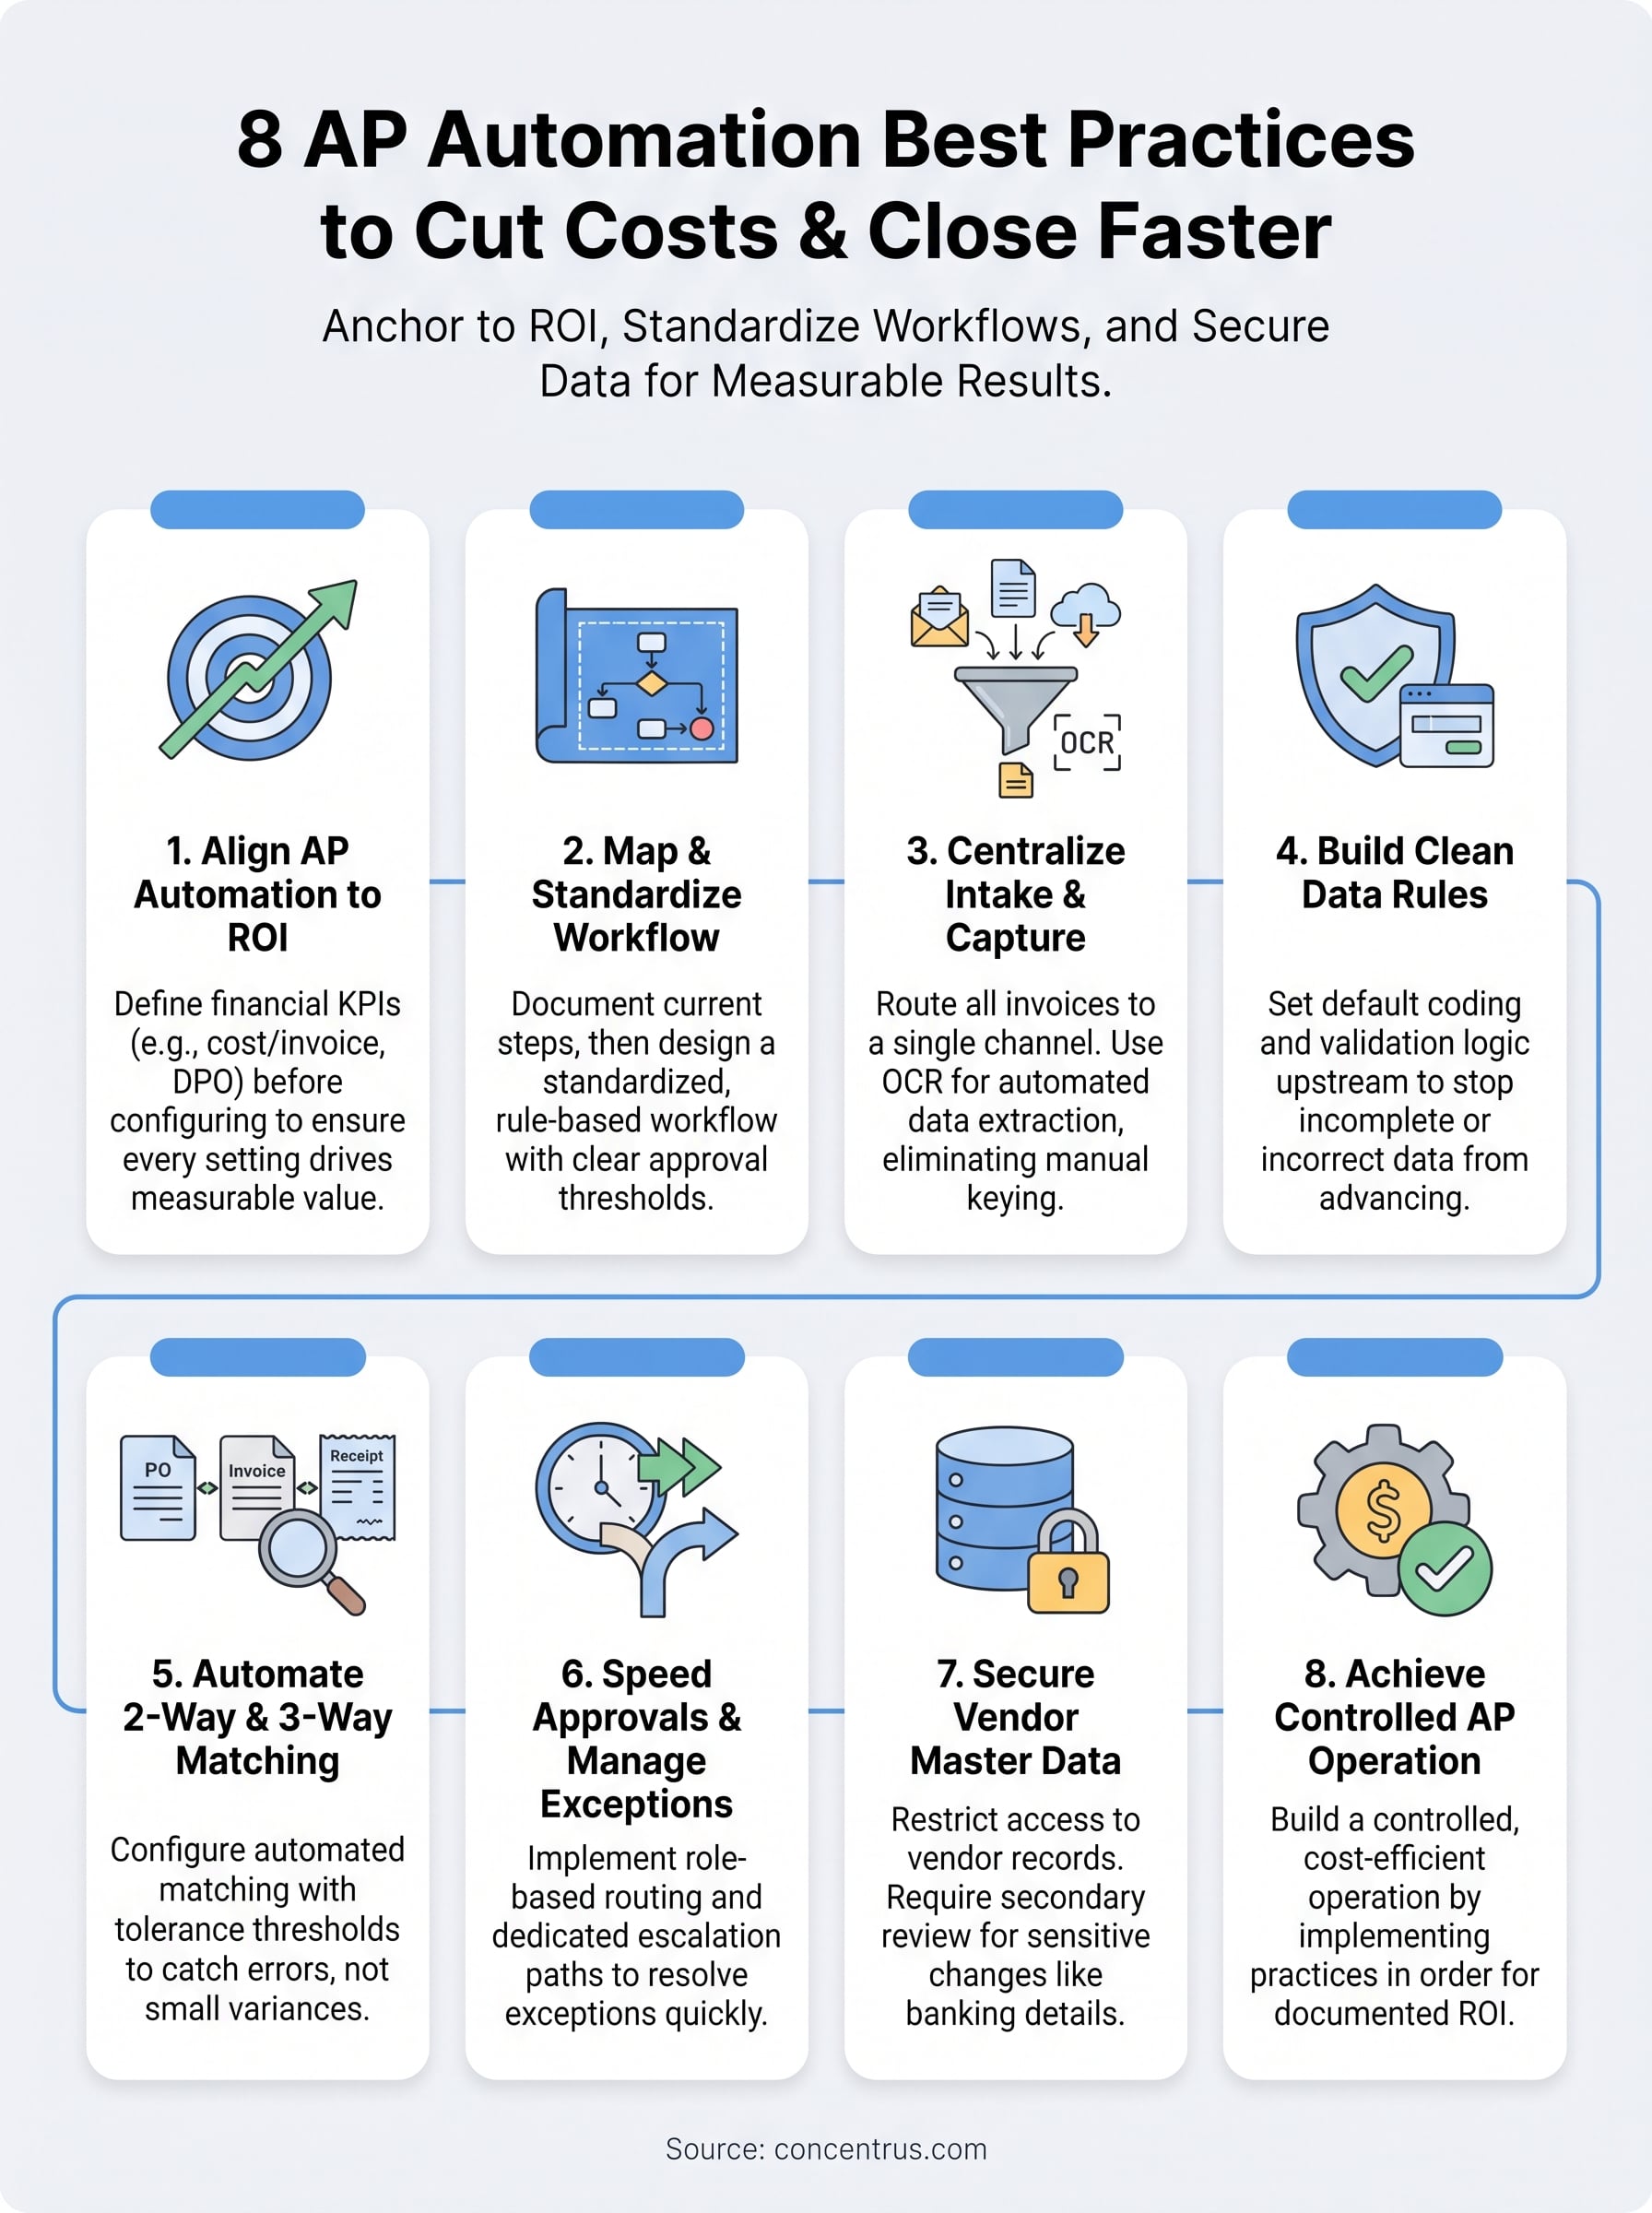
1. Align AP automation to ROI with Concentrus
Before you touch a single workflow setting, anchor your AP automation project to specific financial outcomes. Without that anchor, you risk automating a broken process and getting faster errors instead of faster results. Concentrus builds every ERP engagement around the ROI Roadmap™ methodology, which means AP automation decisions tie directly to KPIs your CFO actually cares about, not just operational conveniences.
What to do
Start by identifying the three to five financial metrics that AP automation should move for your business. These typically include cost-per-invoice, days payable outstanding (DPO), early payment discount capture rate, and month-end close duration. Once you define these targets upfront, every configuration decision has a clear filter: does this setting help you hit your target or not?
Defining your financial targets before configuration is what separates AP automation that delivers ROI from AP automation that just digitizes paperwork.
How to set it up in NetSuite and Acumatica
In NetSuite, use saved searches and financial dashboards to baseline your current AP metrics before go-live. Set up role-based KPI scorecards so your AP team and finance leadership view the same data in real time. In Acumatica, configure AP preferences and reporting periods to align with your close calendar, and use the built-in financial reporting tools to track invoice cycle time from day one.
Both platforms support custom fields and approval workflows that you can configure around your defined KPIs rather than generic defaults. Concentrus maps these settings directly to your ROI Roadmap™ targets so nothing gets set up without a measurable purpose.
KPIs to prove ROI
Track these metrics to confirm your ap automation best practices are generating real returns:
- Cost per invoice processed (target: below $3 with full automation)
- Invoice cycle time (days from receipt to approval)
- Early payment discount capture rate (percentage of available discounts taken)
- AP error rate (duplicate or incorrect payments per period)
Common mistakes to avoid
The most common mistake finance teams make is automating before baselining. If you don’t know your current cost-per-invoice or cycle time, you have no way to prove the investment paid off. A second mistake is configuring AP automation to mirror a manual process exactly, which locks in inefficiencies rather than eliminating them. Build your target-state workflow first, then configure your ERP to match it.
2. Map and standardize the AP workflow
Before you automate anything, you need a clear, documented picture of how invoices move through your organization today. Automation amplifies whatever process you feed it, so a disorganized workflow with inconsistent steps will produce inconsistent results at scale. Mapping your current state reveals the exact bottlenecks, handoff gaps, and approval delays that your ERP should eliminate.
What to do
Walk every invoice through your existing process and document each step, owner, and decision point. Identify where invoices stall, who touches them more than once, and which steps add no real value. Then design your target-state workflow with defined routing rules, approval thresholds, and exception paths. Your standardized process becomes the blueprint for every automation configuration that follows.
Automating a process you haven’t standardized first is the fastest way to scale chaos instead of efficiency.
How to set it up in NetSuite and Acumatica
In NetSuite, use approval workflow templates to encode your standardized routing rules by vendor type, department, or invoice amount. In Acumatica, configure AP approval maps under the workflow module to enforce consistent routing without manual handoffs. Both platforms allow you to set role-based permissions that prevent invoices from skipping required steps.
KPIs to prove ROI
- Invoices processed without exception (target: 80% or higher straight-through rate)
- Average approvals per invoice (fewer touches signals a cleaner workflow)
- Workflow deviation rate (percentage of invoices that bypass standard routing)
Common mistakes to avoid
Teams often skip the mapping step because it feels slow compared to jumping into configuration. Skipping it is one of the most common ap automation best practices failures, since undocumented exceptions and informal approval habits will resurface as broken automations once you go live.
3. Centralize invoice intake and automate capture
Invoices arrive from every direction: email, mail, vendor portals, and EDI feeds. When each channel flows into a different inbox or folder, your AP team wastes time collecting data before processing even begins. Centralizing all invoice intake into a single entry point is one of the most impactful ap automation best practices you can implement because it eliminates the noise at the front of your pipeline before it compounds downstream.
What to do
Define a single intake channel for all incoming invoices and route every vendor to that channel. This typically means a dedicated AP email inbox, a vendor portal, or an integrated EDI connection. Once invoices land in one place, deploy optical character recognition (OCR) or intelligent data capture tools to extract header and line-item data automatically, which removes manual keying entirely.
The moment you stop manually keying invoice data, you cut your error rate at the source.
How to set it up in NetSuite and Acumatica
In NetSuite, connect an OCR integration through the SuiteApp marketplace to auto-populate bill records from scanned or emailed PDFs. In Acumatica, the built-in AP document recognition feature uses machine learning to capture vendor, amount, and line-item data directly from uploaded invoices, reducing manual setup time significantly.
KPIs to prove ROI
These three metrics tell you whether your intake centralization is working:
- Invoice capture accuracy rate (target: 95% or higher)
- Manual keying time per invoice (target: near zero)
- Duplicate invoice rate (should drop sharply after centralization)
Common mistakes to avoid
Many teams centralize intake without enforcing vendor compliance, so invoices still arrive through unofficial channels. Set clear vendor communication policies and update your vendor onboarding process to require approved submission methods from day one.
4. Build clean data rules for coding and validation
Even with centralized intake and automated capture, invoices can still move through your system with incorrect GL codes, missing cost centers, or mismatched vendor records. Garbage in, garbage out. Enforcing clean data rules at the coding and validation stage is one of the most overlooked ap automation best practices, and fixing it upstream saves significant time during reconciliation and close.
What to do
Define default coding rules for each vendor so the system assigns the correct GL account, department, and project code automatically on invoice creation. Layer in validation logic that flags any invoice missing required fields before it moves into the approval queue. This stops incomplete records from reaching approvers and prevents manual corrections from piling up at month-end.
Validation rules work best when you set them once at the vendor or expense category level, rather than correcting individual invoices after the fact.
How to set it up in NetSuite and Acumatica
In NetSuite, configure vendor-level default expense accounts and use workflow-based validation rules to enforce required field completion before bills advance. In Acumatica, use the AP preferences and vendor class settings to assign default posting accounts and apply document validation controls that halt incomplete invoices at entry.
KPIs to prove ROI
- Coding accuracy rate (target: 98% or higher on first entry)
- Invoices returned for correction (should trend toward zero)
- Reconciliation time at period close (directly impacted by upstream data quality)
Common mistakes to avoid
Teams often create too many GL accounts or cost centers without corresponding automation rules, which forces manual selection on every invoice. Simplify your chart of accounts and tie default coding directly to vendors and expense categories so the system does the work.
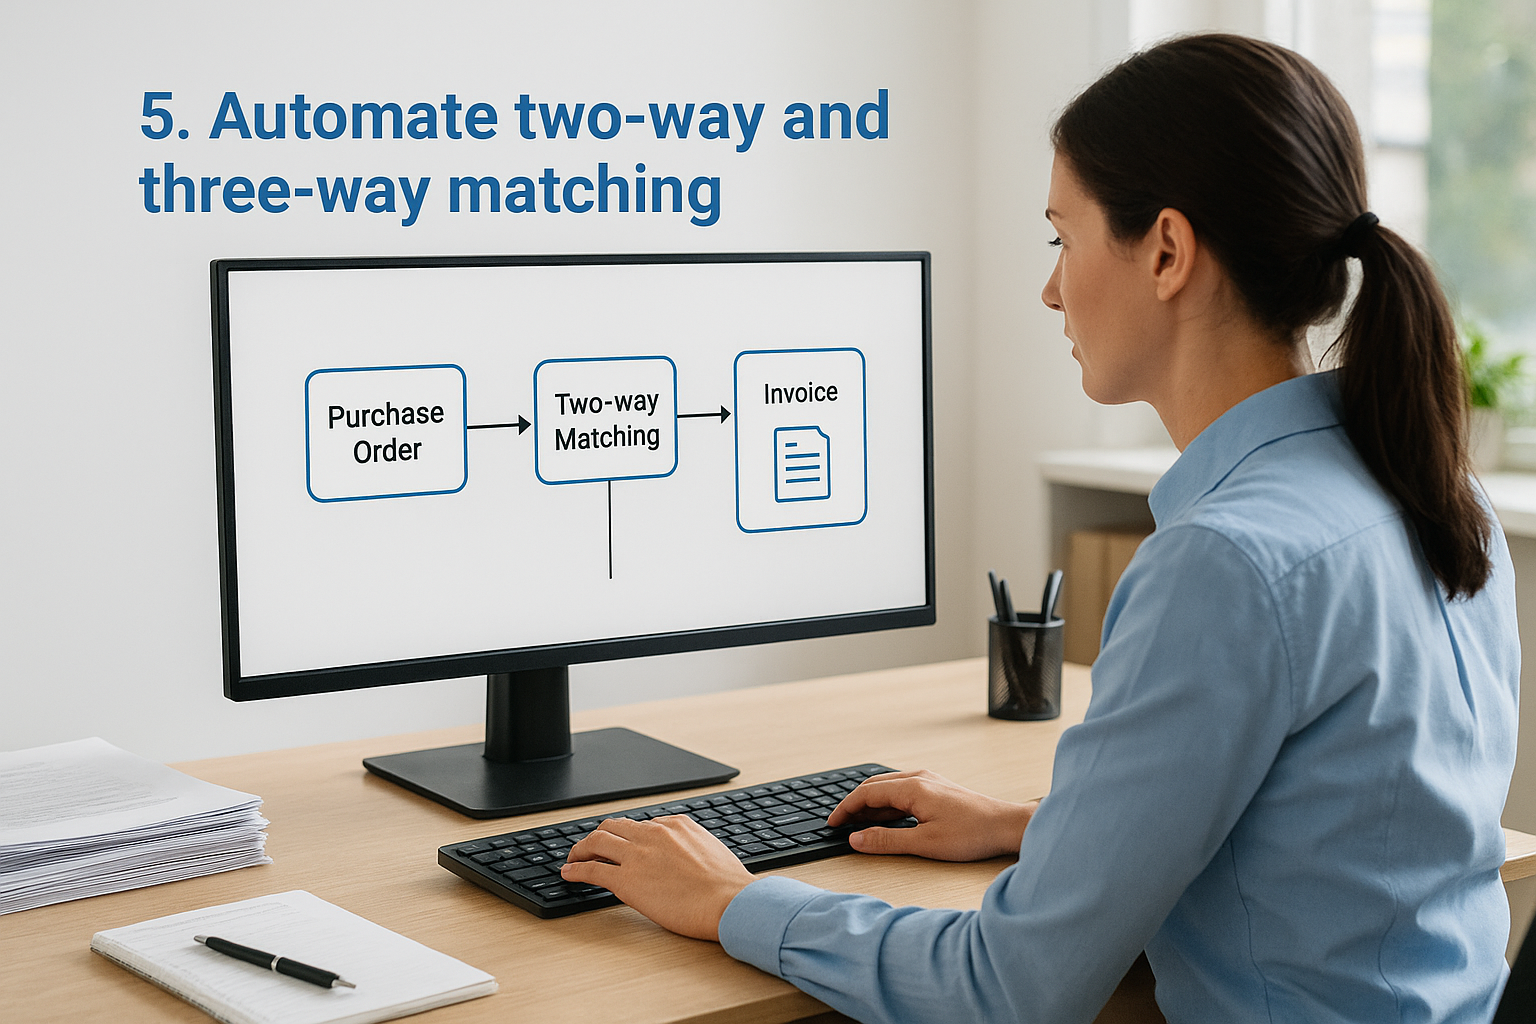
5. Automate two-way and three-way matching
Manual invoice matching drains hours from your AP team each week. Two-way matching compares a purchase order against the vendor invoice, while three-way matching adds the receiving document to confirm goods or services were actually delivered. Automating both steps removes a significant source of overpayments, fraud exposure, and approval delays from your process.
What to do
Configure your ERP to trigger matching rules automatically when an invoice enters the system. Two-way matching works well for service-based purchases where a receipt is never generated, while three-way matching applies to goods-based procurement where a physical or digital receiving record exists. Define tolerance thresholds so small variances don’t block every invoice, only genuine discrepancies that require human review.
Tight tolerance rules reduce false exceptions while still catching the payment errors that cost you real money.
How to set it up in NetSuite and Acumatica
In NetSuite, link bills directly to purchase orders using the PO-to-bill workflow, which flags quantity and price discrepancies automatically before an approver sees the invoice. In Acumatica, the purchase order matching settings under AP preferences let you configure two-way or three-way matching by document type, with variance tolerance controls built into the approval map.
KPIs to prove ROI
These numbers confirm your matching automation is delivering against your ap automation best practices goals:
- Match rate on first pass (target: 85% or higher)
- Overpayments per period (should approach zero)
- Exception resolution time (days to clear flagged invoices)
Common mistakes to avoid
Teams often set tolerance thresholds too wide, which lets pricing errors pass through undetected. Start with tighter tolerances, review your exception volume after 30 days, and adjust from there rather than loosening rules at setup just to reduce exception volume.
6. Speed approvals and manage exceptions
Slow approvals are one of the most common reasons AP automation fails to deliver its full potential. Even with clean data and automated matching, invoices stall when approval chains are unclear or exceptions sit in someone’s inbox for days. Fixing this step turns your AP pipeline from a bottleneck into a reliable, high-speed process.
What to do
Build role-based approval routing that sends each invoice directly to the right approver based on amount, department, or vendor type without requiring manual assignment. For exceptions, create a dedicated escalation path with defined response windows so flagged invoices never sit idle. The goal is zero ambiguity about who owns each invoice at every stage.
When every approver knows exactly what they’re responsible for and when, exception resolution time drops fast.
How to set it up in NetSuite and Acumatica
In NetSuite, use the approval workflow engine to configure amount-based routing rules and set automatic escalation triggers if an approver doesn’t act within your defined window. In Acumatica, the approval map settings under the AP module let you layer multiple approval conditions and assign backup approvers to prevent bottlenecks when team members are unavailable.
KPIs to prove ROI
- Average approval cycle time (target: under 24 hours for standard invoices)
- Exception resolution time (days from flag to clearance)
- Invoices approved on first submission (signals clean upstream ap automation best practices)
Common mistakes to avoid
Teams often build too many approval tiers to satisfy every edge case, which creates the same delays they were trying to eliminate. Keep your approval structure flat, set clear thresholds, and reserve extra tiers only for high-value or high-risk transactions.
7. Secure vendor master data and payments
AP automation removes friction from your payment process, but that speed becomes a liability if your vendor master data is uncontrolled. Fraudulent vendor records, unauthorized changes to banking details, and duplicate vendor entries are among the highest-cost risks in any AP operation. Locking down this data is one of the most critical ap automation best practices you can enforce.
What to do
Restrict who can create, edit, or deactivate vendor records to a small group of authorized users, and require a secondary review before any banking information changes take effect. Build a formal vendor onboarding checklist that includes identity verification and W-9 or banking detail confirmation before a vendor enters your payment run. Treat any change to payment routing as a high-risk event that requires documented approval.
A single unauthorized change to a vendor bank account can cost more than an entire year of AP automation savings.
How to set it up in NetSuite and Acumatica
In NetSuite, apply role-based permissions to restrict vendor record editing and enable the audit trail feature to log every change to banking fields. In Acumatica, configure access rights by role under the vendor maintenance screen and use the built-in change approval settings to require a second sign-off on payment detail updates.
KPIs to prove ROI
- Unauthorized vendor record changes per period (target: zero)
- Vendor master audit completion rate (quarterly review coverage)
- Fraudulent payment incidents (should remain at zero with proper controls)
Common mistakes to avoid
Many teams assign vendor maintenance access too broadly because it feels convenient during initial setup. Audit your user roles after go-live and remove edit access from anyone who doesn’t have a direct need to manage vendor records.
What to do next
These eight ap automation best practices give you a clear path from manual, error-prone processing to a controlled, cost-efficient AP operation. Each practice builds on the last, so the order matters. You start by anchoring automation to financial outcomes, then standardize your workflow, lock down your data, and protect your vendor records. Skip any step and you introduce risk into the stages that follow.
Your ERP, whether NetSuite or Acumatica, can support every practice covered here, but configuration decisions need to match your specific financial goals and close requirements. That alignment is exactly where most implementations fall short without expert guidance.
Concentrus works with CFOs and finance leaders to implement AP automation that delivers measurable, documented ROI from day one. If you want a partner who ties every configuration decision to your financial targets, connect with the Concentrus team to start building your roadmap.