
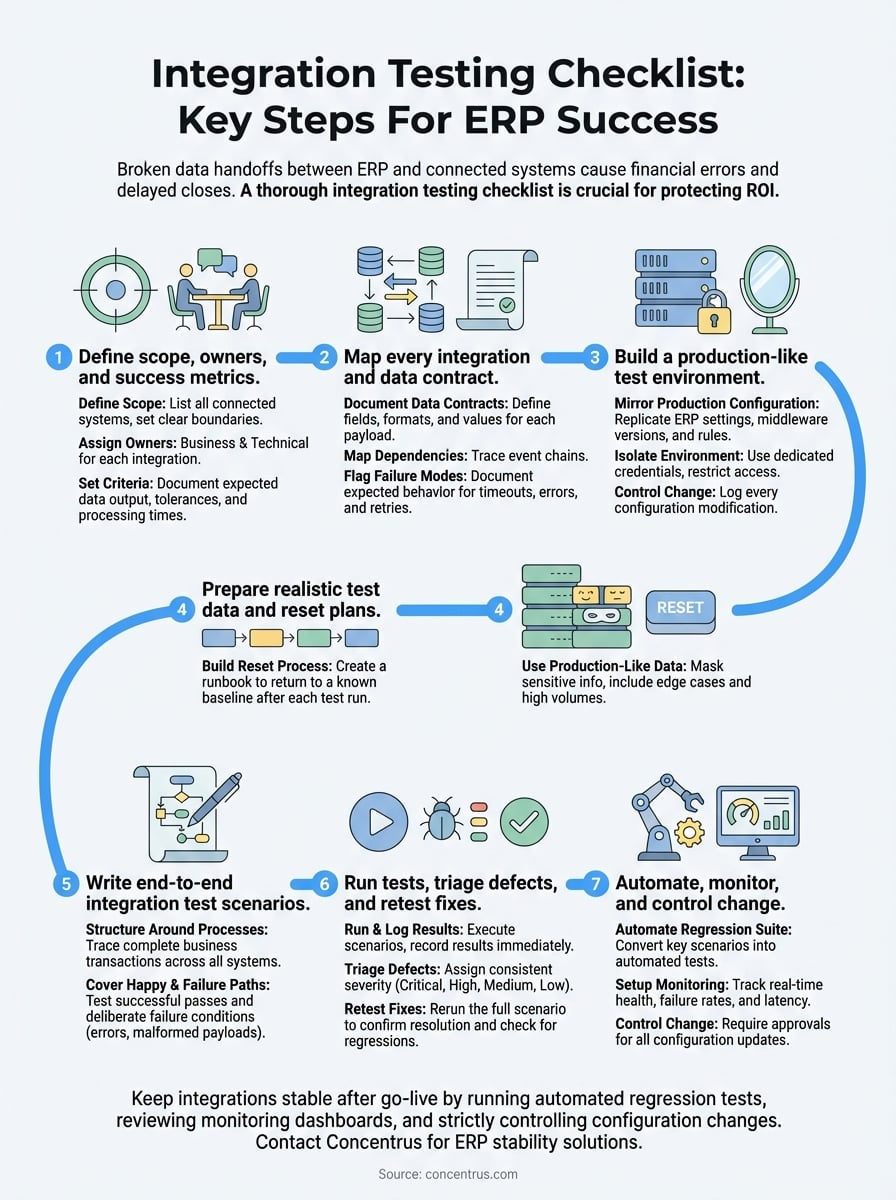
A single broken data handoff between your ERP and a connected system can cascade into incorrect invoices, mismatched inventory counts, or delayed financial closes. For CFOs and finance leaders who’ve invested heavily in NetSuite or Acumatica, these aren’t hypothetical risks, they’re the exact problems that erode the ROI you were promised. That’s why a thorough integration testing checklist is one of the most critical tools in any ERP project, and one that’s too often rushed or skipped entirely.
At Concentrus, we’ve implemented and rescued enough ERP systems to know that integration failures rank among the top reasons projects stall or underdeliver. When modules don’t communicate correctly, or when third-party systems like payment processors, shipping platforms, or CRMs pass bad data, the financial impact hits fast. Catching these issues before go-live isn’t optional; it’s foundational to protecting your investment.
This guide walks you through a structured, step-by-step integration testing checklist built for ERP environments. You’ll get clear testing phases, practical validation steps, and the priorities that matter most when multiple systems need to work as one. Whether you’re mid-implementation or trying to stabilize a system that’s already live, this checklist will help you identify gaps and close them before they become costly problems.
What integration testing means in an ERP rollout
Integration testing in an ERP context is the process of validating that data flows correctly between your ERP core and every connected system, whether that’s a payment gateway, a warehouse management system, a CRM, or a tax engine. Unlike testing a single feature in isolation, integration testing checks the handoffs: does a sales order in NetSuite correctly trigger a fulfillment record in your 3PL system? Does an invoice from Acumatica push the right data to your payment processor without dropping line-item detail? These connections are where most ERP failures actually live, and they’re the focus of any serious integration testing checklist.
How integration testing differs from unit or UAT testing
Many ERP teams confuse integration testing with user acceptance testing (UAT), but they test entirely different things. Unit testing checks that a single module or function works correctly on its own, while UAT verifies that end users can complete their workflows inside the system. Integration testing sits between these two phases. Its job is to confirm that data passing between two or more systems arrives complete, formatted correctly, and triggers the right downstream actions. A passing UAT score doesn’t tell you whether your CRM sync drops custom fields during a large batch run; only integration testing catches that.
Integration testing is not a subset of UAT. It’s a distinct phase that validates the boundaries between systems, not just the behavior inside them.
Running your integration tests before UAT begins, not during it, protects your timeline. When users encounter data problems in UAT that stem from broken integrations, your team wastes time diagnosing root causes that should have already been resolved. Starting with a structured integration testing phase means UAT testers work with clean, reliable data, and any issues they surface are genuinely about usability rather than corrupted or incomplete data records.
The most common integration points in an ERP system
ERP systems sit at the center of your business operations, which means they connect to a wide range of external systems. Mapping every integration point before you test is the step that determines how thorough your coverage actually gets. The table below lists the integration categories that appear most often in NetSuite and Acumatica environments:

| Integration Category | Example Systems | Data Flowing |
|---|---|---|
| E-commerce | Shopify, Magento | Orders, inventory, customer records |
| Payment processing | Stripe, Authorize.net | Invoices, receipts, refunds |
| Tax compliance | Avalara, Vertex | Tax rates, transaction records |
| Shipping and logistics | ShipHawk, ShipBob | Fulfillment orders, tracking updates |
| CRM | Salesforce, HubSpot | Opportunities, contacts, pipeline data |
| Banking and reconciliation | Bank feeds, open banking APIs | Transactions, balances |
| Reporting and BI | Tableau, Power BI | Financial data exports |
Each of these connection points requires its own test scenarios, covering both successful data passes and failure conditions like timeouts, malformed payloads, or duplicate records. When you map these out before testing begins, you cut the risk of discovering a broken connection during go-live, when the cost and urgency to fix it are at their highest.
Step 1. Define scope, owners, and success metrics
Before you write a single test case, you need a clear picture of what you’re testing and who’s responsible for each piece. Skipping this step is the most reliable way to end up with overlapping efforts, missed integration points, and no agreement on what “passing” actually means. Start by listing every system that connects to your ERP, then draw a boundary around what the current testing phase covers. Out-of-scope integrations need to be documented explicitly, not just left out, so no one assumes they’re already handled.
Assign a named owner to every integration
Each integration in your scope needs one person who owns it and one person who approves it. Without clear ownership, defects get reported and then stall because no one knows who should triage them. Assign owners from both the business side and the technical side, since integration failures often require both a system fix and a process decision.
Use a simple ownership matrix to track this from day one:
| Integration | Business Owner | Technical Owner | Priority |
|---|---|---|---|
| E-commerce to ERP order sync | Sales Ops Manager | ERP Consultant | High |
| Tax engine (Avalara) | Controller | NetSuite Admin | High |
| Shipping (ShipHawk) to ERP | Warehouse Lead | Integration Developer | Medium |
| CRM to ERP customer sync | Sales Director | CRM Administrator | Medium |
| Bank feed reconciliation | CFO | ERP Consultant | High |
If no one owns an integration, no one fixes it when it breaks during testing.
Set pass/fail criteria before testing starts
Your integration testing checklist loses its value if your team can’t agree on what a passing result looks like. Define your criteria upfront in writing, before the first test runs. Vague standards like “data looks right” create disputes during defect triage that slow everything down.
For each integration, document three things: the expected data output, the acceptable tolerance for any numeric fields, and the maximum allowable processing time. For example, a tax engine integration should pass only if every transaction returns the correct tax rate with zero rounding errors and a response time under three seconds. Concrete criteria like these remove ambiguity and make your test results defensible to stakeholders who weren’t in the room when decisions were made.
Step 2. Map every integration and data contract
Once your scope and owners are locked in, the next task is to document exactly what data moves between each system and what format it needs to arrive in. A data contract is a written agreement that defines the structure, field names, data types, and acceptable values for every payload passing through an integration. Without these contracts in place, your integration testing checklist has no baseline to test against, because you haven’t yet defined what correct looks like at the system boundary.
Document the data contract for each integration
Start by pulling the API documentation or middleware configuration for each connected system and confirm the fields your ERP expects to send or receive. Then write those expectations down in a format your whole team can reference during testing. The table below gives you a working template for a single integration:
| Field | Source System Field Name | Target System Field Name | Data Type | Required | Accepted Values |
|---|---|---|---|---|---|
| Order ID | order_id | tranid | String | Yes | Alphanumeric, max 20 chars |
| Order total | total_price | amount | Decimal | Yes | Positive, 2 decimal places |
| Customer email | customer.email | custbody_email | String | Yes | Valid email format |
| Shipping method | shipping_line.title | shipmethod | String | No | Mapped to ERP ID |
| Tax amount | total_tax | taxamount | Decimal | Yes | Non-negative |
Repeat this for every integration in your scope. A completed set of data contracts gives testers a clear reference for validating each payload, and it gives developers a precise target when they’re debugging a field mismatch.
A data contract transforms vague expectations into testable, documented standards your entire team can hold each other to.
Flag dependencies and failure modes
Every integration sits inside a chain of events, and you need to trace that chain before you write your first test case. If your e-commerce platform sends an order to your ERP, which then triggers a fulfillment record in your 3PL, a failure at step one breaks everything downstream. Map these sequences explicitly so your tests cover the full path, not just the first handoff.
Beyond sequencing, document what should happen when an integration fails: does the system retry automatically, send an alert, or silently drop the record? Knowing the expected failure behavior lets you test it on purpose, which is far better than discovering it by accident during a high-volume production day.
Step 3. Build a production-like test environment
Your integration tests are only as reliable as the environment you run them in. If your test environment differs significantly from production, you’ll get results that don’t translate, and you’ll discover those gaps at the worst possible moment. Every configuration, connection, and middleware setting in your test environment should mirror what your live system will use, including API endpoints, authentication credentials, and data transformation rules.
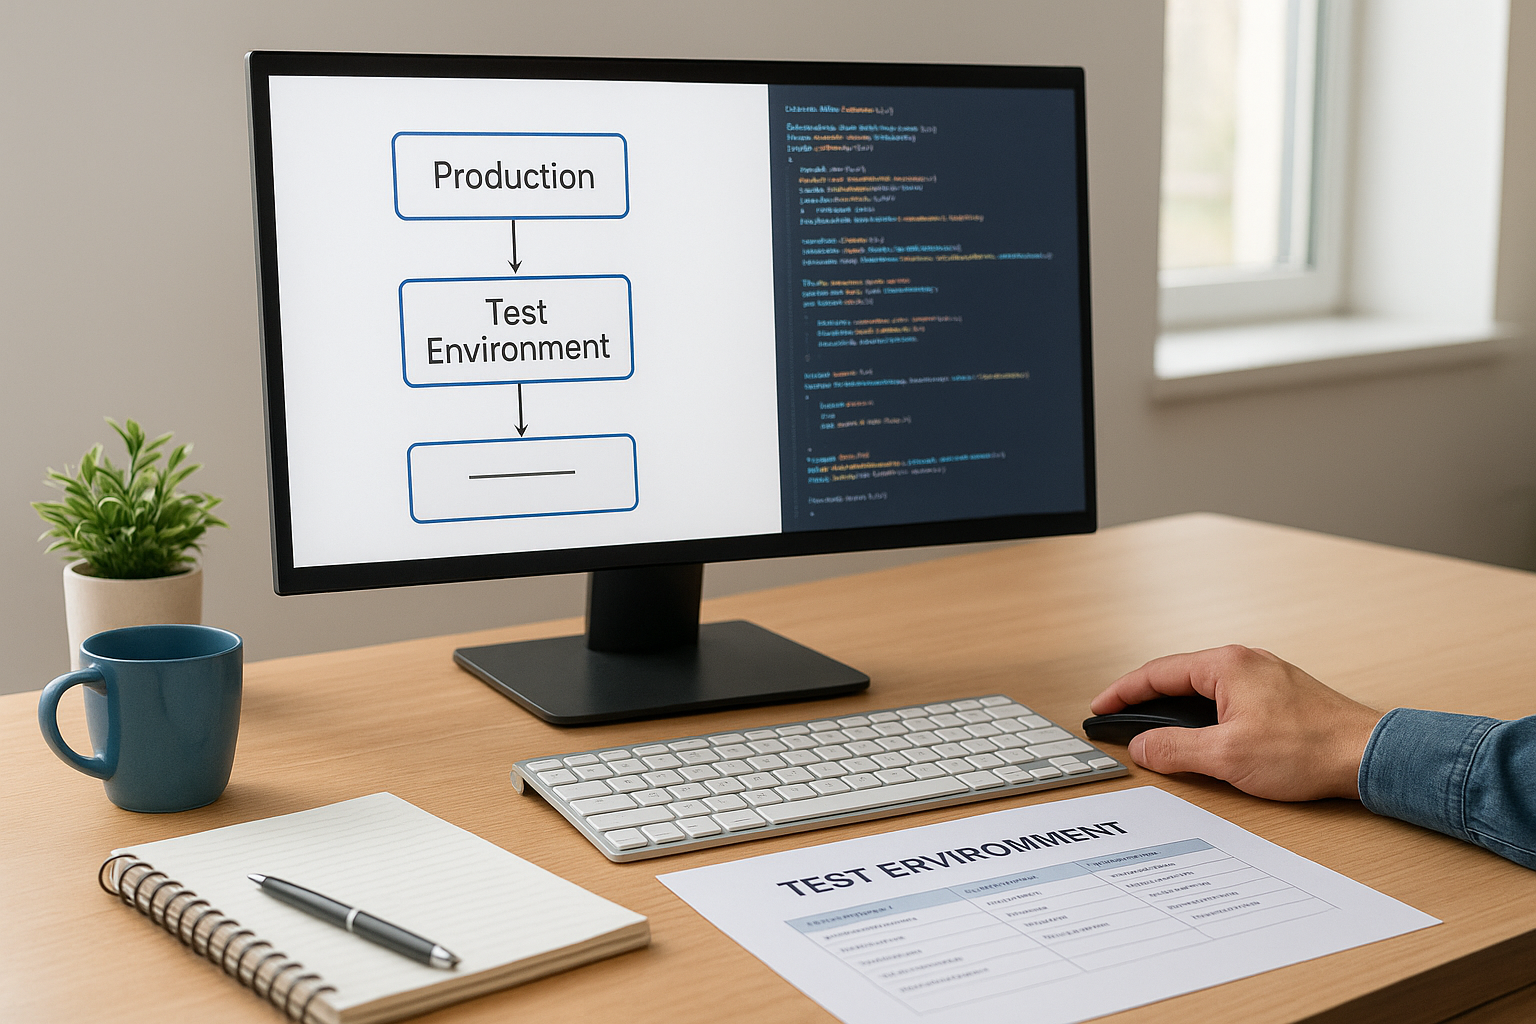
Testing in a stripped-down or misconfigured environment gives you false confidence, not real coverage.
Mirror your production configuration
Start by taking a complete inventory of your production environment’s settings and replicating them in your test instance. This includes ERP module configurations, third-party connector versions, and any custom scripts or workflow rules that touch integration points. Use the table below as a configuration parity checklist:
| Configuration Element | Production Value | Test Environment Value | Match? |
|---|---|---|---|
| ERP version / patch level | Current release | Same release | Yes / No |
| Middleware platform and version | e.g., Celigo v4.2 | Same version | Yes / No |
| API authentication method | OAuth 2.0 | OAuth 2.0 | Yes / No |
| Tax engine sandbox mode | Disabled (live) | Enabled (sandbox) | Noted |
| Shipping connector endpoint | Production URL | Sandbox URL | Noted |
| Custom scripts active | Yes | Yes | Yes / No |
Any deliberate differences, like using a sandbox tax endpoint instead of a live one, must be documented with a clear rationale so your team understands what those differences mean for test validity.
Control access and isolate the environment
Your test environment needs to be completely isolated from your live production data. An incorrectly routed API call that writes test records into your production system can corrupt financial data, trigger real customer-facing transactions, or create reconciliation nightmares. Set up network-level restrictions and use dedicated test credentials that cannot interact with production systems.
Beyond isolation, limit who can change the test environment once testing begins. Uncontrolled configuration changes mid-testing invalidate earlier results because you can no longer trust that tests ran against the same baseline. Treat your test environment like a controlled experiment, and log every change with a timestamp and a reason. This discipline keeps your integration testing checklist results reproducible and defensible when stakeholders ask why a test passed or failed.
Step 4. Prepare realistic test data and reset plans
The quality of your test results depends directly on the quality of your test data. If you test with placeholder values like “Test Customer 1” and “$100.00,” your integration may pass tests that it would fail against the messy, edge-case-heavy data your live system actually handles. Realistic test data uncovers field truncations, character encoding issues, and calculation errors that clean sample data never surfaces, and your integration testing checklist is only as thorough as the data you run it against.
Use production-like data without exposing real records
Copy the structure and complexity of your production data, but mask or anonymize any personally identifiable information before loading it into your test environment. Data masking scripts can replace real customer names, emails, and financial figures with synthetic values while preserving the data shape that your integrations actually process. Your test dataset should include edge cases: orders with multiple tax jurisdictions, invoices with discount stacking, customers with special characters in their names, and transactions at or near field length limits.
Use the following categories as a minimum baseline for test data coverage:
- Standard records: typical transactions that represent your average daily volume
- High-volume batches: bulk imports or sync runs that stress the integration at scale
- Edge cases: null fields, maximum character lengths, zero-dollar transactions, and near-duplicate IDs
- Error scenarios: records intentionally formatted to trigger the failure modes you documented in Step 2
Build a repeatable reset process
After each test run, your environment needs to return to a known baseline before the next round starts. Without a reset plan, residual data from previous test runs contaminates subsequent results, making it nearly impossible to tell whether a new test passed on its own merits or because stale records from the last run influenced conditions in its favor.
A reset plan is not optional. Without one, your test results are neither trustworthy nor repeatable.
Document your reset steps as a numbered runbook that anyone on the team can execute without guidance. For each integration, specify which records get deleted, which counters or sequence numbers get rolled back, and which system states need confirmation before testing resumes. For example, if your e-commerce sync creates order records in your ERP during testing, your runbook should include a step to delete those test orders and verify the order counter returns to its pre-test starting value.
Step 5. Write end-to-end integration test scenarios
With your environment ready and your test data prepared, the next step is to write the actual test scenarios your team will execute. Each scenario in your integration testing checklist should trace a complete business transaction from its origin system through every handoff until it reaches its final destination. Testing only one leg of a multi-system transaction leaves the rest of the chain unverified, which means defects in downstream steps survive until production.
Structure each scenario around a business process
Start by anchoring each test scenario to a real business event, not a technical function. An order placed on your e-commerce platform is a business event; the API call that triggers is just the mechanism. Writing scenarios from a business perspective keeps your tests grounded in outcomes your finance and operations teams actually care about. Use the following template as your standard format for every scenario you document:
| Field | Detail |
|---|---|
| Scenario ID | INT-001 |
| Business process | Customer order from Shopify to NetSuite to ShipHawk |
| Trigger | New paid order created in Shopify |
| Systems involved | Shopify, NetSuite, ShipHawk |
| Expected data output | Sales order in NetSuite with correct line items, amounts, and customer record; fulfillment order in ShipHawk with matching SKUs and shipping method |
| Pass criteria | All fields match data contract; fulfillment triggers within 60 seconds |
| Fail criteria | Any field mismatch, missing record, or timeout beyond 60 seconds |
Replicate this template for every integration path in your scope, including tax calculations, bank feed imports, CRM syncs, and any other connections you mapped in Step 2.
Cover both happy paths and failure conditions
Most teams write tests that confirm what happens when everything works correctly, then stop. Your scenarios need to include deliberate failure conditions with the same level of detail as your success cases. For each integration, write at least one scenario where the incoming payload is malformed, a required field is null, or the source system returns an error code.
Testing only success paths is the equivalent of testing a fire alarm by assuming there will never be a fire.
Document what your system should do in each failure scenario: retry, alert an admin, log the error, or reject the record with a specific message. Confirming that failure-handling behaves as designed is just as important as confirming that clean data flows correctly.
Step 6. Run tests, triage defects, and retest fixes
Running the tests is where your integration testing checklist moves from planning to proof. Execute each scenario in the order you documented in Step 5, and log every result immediately, not at the end of the session. Delayed logging introduces memory errors and makes it harder to correlate a failure with the exact environment state that caused it. Assign one person to execute the test and a separate person to log the result so nothing gets filtered or softened before it’s on record.
Triage defects with a consistent severity system
When a test fails, your team needs a shared language for describing how serious it is. Without a severity framework, defects get prioritized based on whoever is loudest in the room rather than actual business impact. Assign every defect a severity level at the moment it’s logged, using the four-tier system below:
| Severity | Definition | Example |
|---|---|---|
| Critical | Blocks a core business process entirely | Sales orders never reach the ERP from e-commerce |
| High | Causes data loss or incorrect financial records | Tax amounts calculate at wrong rate |
| Medium | Causes incomplete data but a workaround exists | Shipping method field arrives blank but can be set manually |
| Low | Minor formatting or labeling issue with no data impact | Field label shows wrong display name |
Severity determines fix priority. A critical defect in your tax engine integration should stop the test cycle until it’s resolved, while a low-severity label issue can wait until the end of the sprint.
Document each defect with a scenario ID, the severity level, the exact data payload that triggered it, the actual output, and the expected output. This detail cuts the time your developers spend reproducing the issue before they can start fixing it.
Retest fixes before closing a defect
Once a developer delivers a fix, you need to rerun the original failing scenario from scratch, not just spot-check the field that was broken. A fix to one field can inadvertently shift how adjacent fields are mapped, and only a full scenario rerun catches that. Record the retest result under the same defect ID so you have a complete audit trail showing what failed, what was changed, and what passed after the fix.
Run a regression pass on any integration that shares logic or infrastructure with the fixed integration. A defect fix in your CRM sync can quietly break your bank feed import if they share the same middleware connection, and discovering that link late costs you far more time than the regression pass would have.
Step 7. Automate, monitor, and control change
Manual test execution works for your initial integration validation, but it doesn’t scale beyond go-live. Integrations that ran cleanly during testing can break after a platform update, a connector version change, or a new configuration pushed without notice. Building automated regression tests and a monitoring layer into your process means you catch those breaks in minutes rather than discovering them through user complaints or incorrect financial reports. This is the step that transforms a one-time integration testing checklist into a continuous quality control system.
Automate your regression test suite
Start by identifying the integration scenarios from Step 5 that cover your highest-priority business processes, specifically the ones tied to financial data, order flow, or inventory. Convert those scenarios into automated test scripts that your team can trigger on a schedule or after any system change. Tools like Postman support collection-based API test automation that you can run from a CI/CD pipeline or on a timed schedule.

Automating your most critical integration tests means a broken connection surfaces within the hour, not at month-end close.
Use the following structure to document each automated test so your team can maintain it over time:
| Test ID | Integration Path | Trigger | Validation Check | Alert Recipient |
|---|---|---|---|---|
| AUTO-001 | Shopify to NetSuite order sync | Hourly | Order count match + field validation | ERP Admin, Controller |
| AUTO-002 | Avalara tax calculation | On transaction | Tax rate accuracy within 0.01% | Controller |
| AUTO-003 | ShipHawk fulfillment trigger | On sales order | Fulfillment record created within 90s | Warehouse Lead |
| AUTO-004 | Bank feed import | Daily at 6 AM | Record count + balance match | CFO |
Document the alert recipient for every automated test so that when a failure fires, the right person gets notified without a routing delay.
Set up monitoring and change controls
Once your automated tests are running, add [real-time monitoring](https://concentrus.com/real-time-vs-batch-integration/) to each integration endpoint so you capture failure rates, latency trends, and error codes as they happen rather than after the damage is done. Most middleware platforms log this data natively; build a simple dashboard that your finance and operations leads can check without needing technical access.
Require written change approvals before anyone modifies an integration configuration, including connector version upgrades and API credential rotations. A lightweight change log with a date, a description, and the name of the approver gives you the audit trail you need to diagnose any regression that appears after a system change.
Next steps to keep integrations stable after go-live
Your integration testing checklist doesn’t retire at go-live. Every platform update, connector version change, or new business process you add creates fresh risk across the integration layer you worked to validate. Run your automated regression suite on a fixed schedule, review your monitoring dashboards weekly, and require written approvals before any configuration change touches a live integration. When you spot a failure, trace it back to the last documented change before assuming the root cause is something new.
If your ERP integrations are already live but producing data errors, missed syncs, or reconciliation gaps, the structured approach in this guide still applies. Start with the data contracts and failure mode mapping in Steps 2 and 6, then work forward. Concentrus helps midsized companies stabilize and optimize ERP systems that aren’t delivering the ROI they were built to produce. If that describes your situation, connect with the Concentrus team to get a clear path forward.