
A NetSuite implementation represents one of the most significant technology investments a midsized company will make. Yet too many CFOs enter this process without a clear picture of what lies ahead. Understanding the NetSuite implementation phases before you begin gives you the foresight to allocate resources, manage stakeholder expectations, and, most importantly, protect your ROI from day one.
The reality is that ERP projects fail at alarming rates, not because the technology is flawed, but because organizations underestimate the complexity of each phase or skip critical steps altogether. When you know exactly what happens during discovery, design, configuration, testing, deployment, and post-go-live support, you can hold your implementation partner accountable and make informed decisions at every milestone.
At Concentrus, we’ve guided countless finance leaders through NetSuite implementations using our ROI Roadmap™ methodology, which ties every phase directly to measurable financial outcomes. This guide breaks down each stage of the implementation lifecycle, explains what you should expect from your team and your partner, and highlights the key milestones that separate successful projects from costly failures. Whether you’re planning your first implementation or evaluating a project already in progress, this framework will give you the clarity you need to move forward with confidence.
What a CFO should lock in before the phases start
Before you dive into the actual NetSuite implementation phases, you need to establish the foundational elements that determine whether your project will deliver measurable ROI or become another failed ERP statistic. Most implementation failures trace back to decisions made (or avoided) before discovery even begins. Your job as CFO is to lock in the strategic framework, governance structure, and success metrics that will guide every decision throughout the project lifecycle.
Define ROI metrics tied to business outcomes
You cannot manage what you do not measure. Start by identifying the specific financial outcomes you expect NetSuite to deliver within the first 12 months post-go-live. These metrics should tie directly to your P&L, balance sheet, or operational efficiency goals, not to vague technology milestones like "system adoption" or "process improvement."
Lock in quantifiable ROI targets before signing any contract or scope document so every phase can be measured against your financial goals.
Document each metric with a baseline, target, and measurement method so your implementation partner can design the system to track these outcomes automatically. Here are the most common ROI metrics CFOs prioritize:
| Financial Metric | Baseline Example | Target Example | Measurement Method |
|---|---|---|---|
| Month-end close cycle | 12 business days | 5 business days | Financial calendar timestamp |
| Days sales outstanding (DSO) | 48 days | 35 days | AR aging report |
| Inventory carrying costs | 22% of revenue | 14% of revenue | Inventory valuation report |
| Gross margin visibility | Manual calculation | Real-time by SKU | NetSuite profitability reports |
| Cash forecast accuracy | ±15% variance | ±5% variance | Variance analysis vs actuals |
Establish project governance and decision rights
Your implementation will face dozens of critical decisions about scope, process design, customization, and integrations. Establish a governance structure that defines who makes decisions, who provides input, and how conflicts get escalated before your first discovery meeting. Without this framework, projects stall while teams debate or defer decisions.

Create a RACI matrix (Responsible, Accountable, Consulted, Informed) for every major decision category including chart of accounts design, approval workflows, integration architecture, customization requests, data migration rules, and go-live timing. Assign a single decision maker (typically the CFO or Controller) for financial design choices and make it clear that consensus is not required when speed matters more than perfection.
Secure executive sponsorship and change management resources
NetSuite implementations fail when they are treated as IT projects instead of business transformation initiatives. You need active CEO or COO sponsorship to remove roadblocks, enforce accountability, and communicate the "why" behind process changes to employees who will resist new workflows. Reserve at least 10% of your total project budget specifically for change management, training content development, and internal communications.
Identify the internal champion who will own user adoption after go-live and give them protected time during the implementation phases to shadow consultants, document procedures, and build training materials. This person should report directly to you or another C-level executive, not to IT or operations. Allocate budget now for role-based training sessions, video tutorials, job aids, and post-launch support resources so your team does not discover gaps after contracts are signed.
Step 1. Run discovery and planning with clear ROI targets
The discovery and planning phase is where you translate business problems into system requirements and lock in the scope boundaries that will determine your total cost and timeline. Most teams treat discovery as a passive information-gathering exercise, but you need to drive this phase with strategic intent focused on ROI metrics you defined before the project started. Your implementation partner should spend 80% of discovery time documenting current-state workflows, pain points, and the quantifiable cost of manual processes, not just collecting technical specifications.
Document current state pain points and costs
Your discovery sessions must produce a detailed map of every manual workaround, spreadsheet dependency, and process bottleneck that currently drains time and introduces risk. Walk through month-end close with your accounting team and document how many hours they spend reconciling systems, chasing approvals, or fixing data errors. Capture the names of every Excel file used to supplement your current system because these represent functionality gaps NetSuite must address.
Assign dollar values to each pain point using fully loaded labor costs so you can prioritize requirements and measure post-implementation savings. For example, if your team spends 40 hours per month on manual revenue recognition calculations at a $75/hour rate, that is $36,000 annually NetSuite should eliminate. Build a table that lists every pain point, the annual cost, and the NetSuite module or feature that will address it.
Document the fully loaded cost of each manual process during discovery so you can prove ROI by measuring time savings after go-live.
Map requirements to measurable outcomes
Every requirement your team documents must tie directly to one of your predefined ROI metrics or be challenged as out of scope. If someone requests a custom field, workflow, or integration, ask them which metric it improves and by how much. Requirements that cannot be linked to faster closes, better cash flow, higher margins, or lower costs should be deferred to a future phase unless they address compliance or control gaps.
Create a requirements traceability matrix that shows the connection between each functional requirement, the business process it improves, and the ROI metric it impacts. This document becomes your North Star throughout the remaining NetSuite implementation phases and prevents scope creep driven by "nice to have" features.
Establish phase gates and decision checkpoints
Define the specific deliverables and approval criteria required to exit discovery and move into design. Your phase gate should include a signed requirements document, a data migration complexity assessment, an integration architecture diagram, and a revised project timeline with ROI milestones mapped to each phase. Schedule a formal sign-off meeting with all stakeholders where you review these deliverables and confirm everyone agrees on scope, timeline, and success metrics before configuration work begins.
Step 2. Design the future state and make scope decisions
The design phase is where you stop talking about what NetSuite can do and start deciding exactly how your organization will use it. This is the most critical checkpoint in all NetSuite implementation phases because design decisions lock in the structure of your chart of accounts, approval workflows, role permissions, and reporting hierarchy. Your implementation partner should present multiple design options for each major process, explain the tradeoffs, and force you to choose the path that best serves your ROI metrics rather than defaulting to what your legacy system did.
Lock in your chart of accounts and reporting structure
Your chart of accounts design must support the real-time profitability visibility you need to make better decisions faster. Work with your implementation partner to design a segment structure that tracks revenue, costs, and margin by the dimensions that matter most to your business such as product line, customer type, geography, or project. Build parent-child relationships that roll up automatically so you can view consolidated financials and drill down into detail without manual spreadsheets.
Create a visual hierarchy diagram that shows how subsidiaries, departments, classes, and locations will structure your financial reporting. Here is the framework most CFOs use:
| Dimension | Purpose | Example Values |
|---|---|---|
| Subsidiary | Legal entity consolidation | US Corp, Canada Inc |
| Department | Cost center tracking | Sales, Engineering, G&A |
| Class | Product/service line margin | SaaS, Professional Services |
| Location | Geographic P&L | Northeast, West Coast, EMEA |
Define process workflows and approval hierarchies
Map every approval workflow that touches financial transactions including purchase orders, expense reports, journal entries, bill payments, and sales order discounts. Specify dollar thresholds, required approvers by role, and escalation rules when approvals sit idle. Design workflows that prevent bottlenecks by routing approvals based on amount ranges rather than requiring every VP to approve every $500 expense.
Design approval workflows during this phase with dollar thresholds and role-based routing so you eliminate bottlenecks before go-live.
Document what stays out of scope
Create a written scope boundary document that explicitly lists features, customizations, and integrations you will not build in this phase. Include items like advanced inventory optimization, multi-currency consolidation, or third-party marketplace integrations that can wait until after stabilization. Get every stakeholder to sign this document so they cannot claim surprise when their wishlist item does not appear in the configured system.
Step 3. Configure NetSuite and build integrations and reports
Configuration is where your design decisions transform into a working system that your team can test and validate. This phase requires intense collaboration between your implementation partner, accounting team, and key process owners because every field, workflow, and saved search you build must mirror the exact requirements you documented in design. Your CFO responsibility during this phase is to review configuration deliverables weekly, test critical workflows yourself, and verify that the system tracks the ROI metrics you defined before the NetSuite implementation phases began.
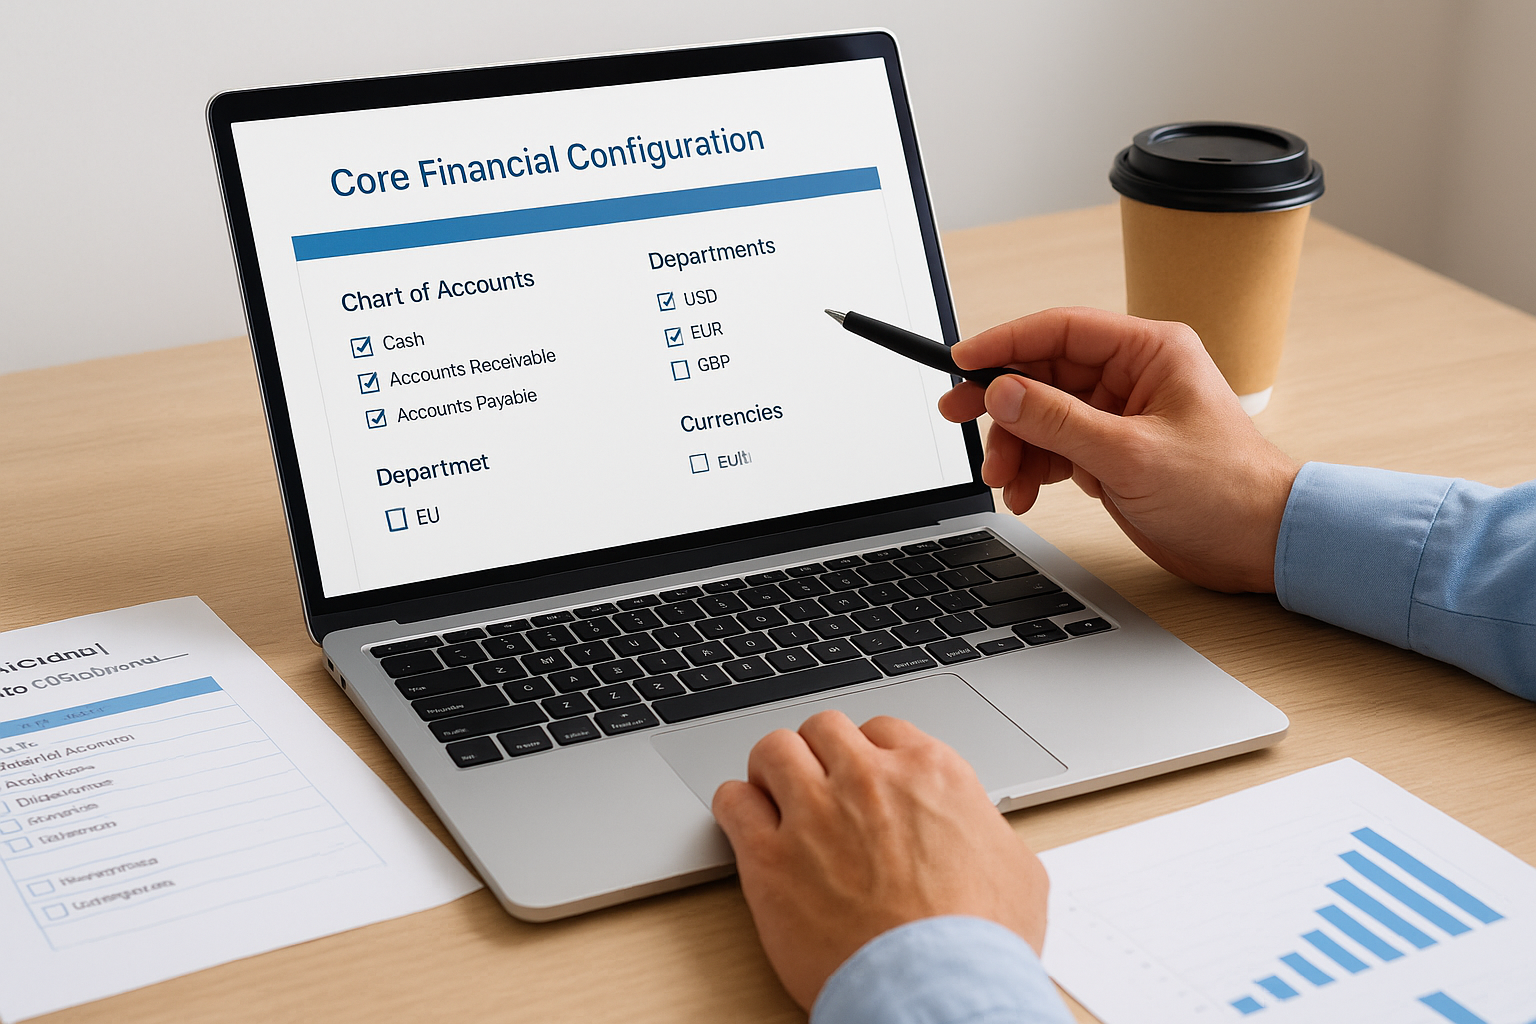
Build your core financial configuration first
Start with the foundational elements that every other module depends on: chart of accounts, subsidiaries, departments, classes, locations, and currencies. Your implementation partner should configure these first because accounting workflows, reporting structures, and integration mappings all reference this core data. Test a complete procure-to-pay and order-to-cash cycle in the sandbox environment before moving to advanced features like revenue recognition or inventory management.
Create a configuration checklist that sequences the build to prevent rework. Here is the order most successful implementations follow:
| Configuration Order | Core Elements | Validation Test |
|---|---|---|
| 1. Foundation | Chart of accounts, subsidiaries, fiscal calendar | Post a journal entry across segments |
| 2. Master data | Vendors, customers, items, employees | Create a PO and sales order |
| 3. Transactional | Workflows, approval routing, tax rules | Process an invoice through approval |
| 4. Reporting | Saved searches, financial reports, dashboards | Run month-end close simulation |
Connect integrations that prevent manual data entry
Map every system that needs to exchange data with NetSuite and define the frequency, direction, and error handling for each integration. Your CRM, payroll system, e-commerce platform, and bank accounts should sync automatically to eliminate the spreadsheet exports that slow your close cycle. Build integrations using native connectors or middleware platforms like Celigo or Boomi rather than custom code because pre-built solutions cost less to maintain and update when NetSuite releases new versions.
Configure integrations to sync transaction data in real time rather than batch uploads at end-of-day so your team sees accurate cash positions and inventory levels throughout the workday.
Test each integration with production-volume data loads to identify performance bottlenecks before go-live. Document the field mappings, transformation rules, and error notification procedures so your team can troubleshoot issues after your implementation partner exits.
Design reports that track your ROI metrics
Build saved searches and dashboards that measure the exact metrics you committed to improving such as close cycle time, DSO, inventory turns, and gross margin by product line. Your accounting team should validate report accuracy by comparing results to your legacy system during parallel testing. Create role-based dashboards that show each user only the KPIs they control so your controller sees consolidation status while your AR manager tracks collection performance.
Step 4. Migrate data and prove controls and compliance
Data migration is where most NetSuite implementation phases encounter their first major crisis because teams underestimate the time required to clean legacy data and validate accuracy. You cannot simply export from your old system and import to NetSuite because inconsistent formats, duplicate records, and incomplete fields will corrupt your new environment. Your CFO responsibility during this phase is to define acceptable error thresholds, validate opening balances, and document every transformation rule so your auditors can trace every dollar from legacy to NetSuite.
Extract, clean, and validate source data
Start by pulling transaction history, master data, and open balances from your legacy system at least 60 days before your planned go-live date to give your team time to identify and fix data quality issues. Run validation queries that flag duplicate vendor records, customers with missing tax IDs, inventory items without unit costs, and transactions with unbalanced debits and credits. Create a data cleansing log that documents every change so you can prove to auditors that corrections followed documented business rules rather than arbitrary edits.
Build a migration validation checklist that your team executes after each test load:
| Validation Test | Acceptance Criteria | Owner |
|---|---|---|
| Trial balance by segment | Matches legacy to the penny | Controller |
| Open AR aging | Matches legacy customer balances | AR Manager |
| Open AP aging | Matches legacy vendor balances | AP Manager |
| Inventory valuation | Matches physical count and costs | Operations |
Execute migration in staged batches with rollback plans
Load historical data first, validate accuracy, then load transactional data in chronological order so you can stop and fix errors without corrupting your entire dataset. Never attempt a single "big bang" migration because one mapping error can require weeks to unwind. Test your rollback procedure by deliberately loading bad data and verifying you can restore the sandbox to a clean state within two hours.
Execute at least three full migration dress rehearsals in your sandbox environment before touching production so your team builds muscle memory for cutover weekend.
Document audit trails and SOX compliance controls
Your auditors will require proof that every transaction migrated to NetSuite maintains complete history from source system through transformation to final load. Create a migration audit packet that includes source file extracts, transformation scripts, validation reports, and NetSuite transaction IDs so you can trace any transaction backward to its origin. Configure NetSuite audit trails, approval workflows, and segregation of duties before loading production data because retroactive control changes trigger audit findings.
Step 5. Test, train, and execute the cutover plan
Testing and training separate successful NetSuite implementation phases from projects that limp into production with low adoption and undetected errors. Your team must validate every workflow under realistic conditions and master the system before you flip the switch on your legacy environment. This phase typically consumes three to four weeks before go-live and requires participation from every person who will touch NetSuite, not just your accounting team. Your CFO role here is to enforce testing discipline, approve training content, and personally review the cutover checklist that will govern your transition weekend.
Run user acceptance testing with production scenarios
Execute at least two full cycles of user acceptance testing where your team processes actual transactions from vendor onboarding through payment, customer order through revenue recognition, and inventory receipt through cost allocation. Document every bug, workflow confusion, and missing report in a centralized tracker with priority levels and assigned owners so nothing falls through the cracks. Your acceptance criteria should require zero critical bugs and fewer than five minor issues before you approve the cutover date.
Create test scripts that mirror your month-end close procedures:
| Test Scenario | Steps | Expected Result |
|---|---|---|
| Procure-to-pay cycle | Create PO, receive goods, match invoice, approve payment | System enforces 3-way match, routes to correct approver |
| Order-to-cash cycle | Enter sales order, fulfill, invoice, receive payment, recognize revenue | Revenue posts per ASC 606 rules automatically |
| Month-end close | Run depreciation, accrue expenses, consolidate subsidiaries, generate financials | Complete close in 5 days or less per your ROI target |
Build training materials and conduct role-based sessions
Develop separate training tracks for each role because your AP clerk needs different skills than your financial analyst or warehouse manager. Record video walkthroughs of common tasks like entering invoices, processing refunds, and running saved searches so users can reference these after your implementation partner exits. Schedule live training sessions no more than two weeks before go-live so knowledge stays fresh.
Schedule training sessions within two weeks of cutover so your team retains the workflows and does not need to relearn procedures after go-live.
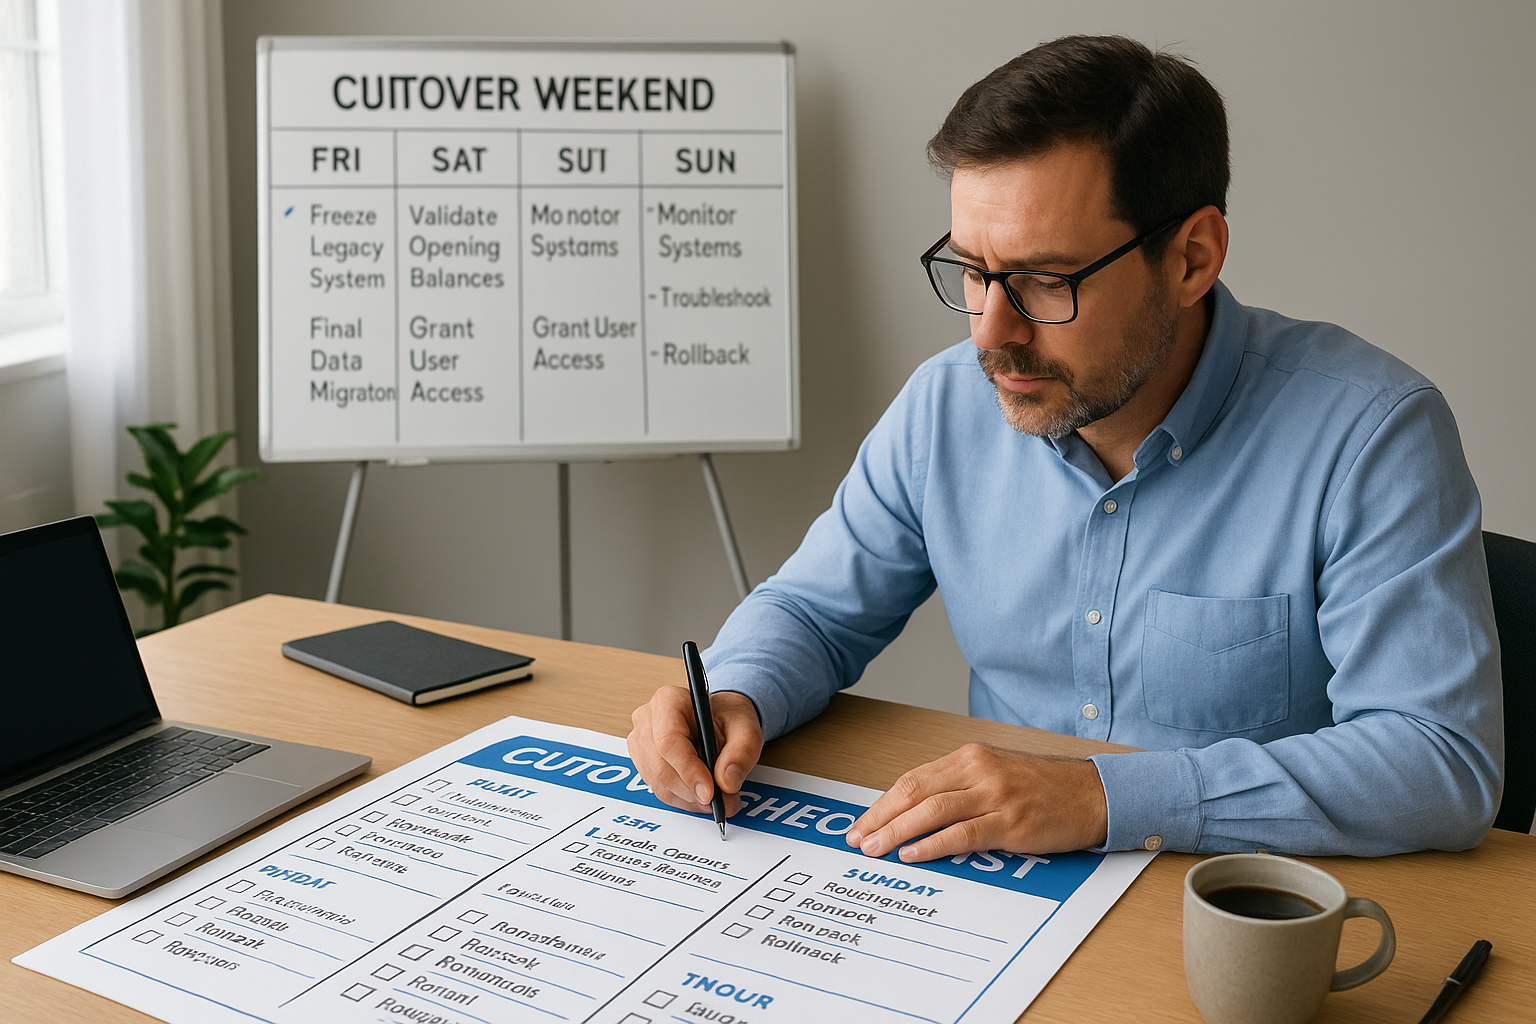
Execute cutover weekend with hour-by-hour checklists
Build a minute-by-minute cutover plan that assigns specific tasks to named individuals and includes rollback decision points if critical issues emerge. Your plan should sequence activities to minimize downtime: freeze your legacy system Friday evening, run final data migration overnight, validate opening balances Saturday morning, and grant user access Sunday afternoon. Designate a war room with direct contact to your implementation partner and establish go/no-go checkpoints every four hours.
Step 6. Go live, stabilize, and measure ROI after launch
Go-live marks the beginning of your ROI measurement period, not the end of your implementation responsibility. The first 90 days after cutover determine whether your NetSuite investment delivers the financial outcomes you committed to or becomes another underperforming system. Your team will encounter issues during this stabilization phase because no amount of testing replicates the complexity of real production volume. Treat this phase as an extension of the NetSuite implementation phases where you actively monitor performance, fix problems before they compound, and validate that every ROI metric is trending toward your targets.
Monitor system performance and resolve critical issues first
Establish a daily standup meeting for the first two weeks after go-live where your accounting team, implementation partner, and process owners review open issues and prioritize fixes. Categorize every reported problem as critical (blocks financial transactions), high (creates workarounds), medium (causes inefficiency), or low (cosmetic) so you allocate resources to what matters most. Create a public issue log accessible to all users with status updates and expected resolution dates so your team sees that problems are being addressed actively.
Focus your immediate attention on transaction processing bottlenecks, integration failures that require manual data entry, and reports that produce incorrect balances. Schedule a daily reconciliation review where your controller compares NetSuite balances to your legacy system for the first month to catch mapping errors before they cascade through multiple accounting periods.
Track ROI metrics against your baseline targets
Pull the exact ROI metrics you defined before the project started and begin measuring actual performance weekly. If you committed to reducing close cycle from 12 days to 5 days, track the calendar days required for each close milestone and identify which bottlenecks remain. Build a dashboard that displays current performance versus target for each metric so stakeholders see progress without requesting ad-hoc reports.
| ROI Metric | Baseline | Month 1 Actual | Month 3 Target | On Track? |
|---|---|---|---|---|
| Close cycle | 12 days | 9 days | 5 days | Yes |
| DSO | 48 days | 44 days | 35 days | Yes |
| Manual journal entries | 85/month | 62/month | 20/month | At risk |
Measure your ROI metrics weekly during the first 90 days so you can course-correct before small inefficiencies become permanent workarounds.
Document lessons learned and plan optimization sprints
Schedule a formal retrospective meeting at 30, 60, and 90 days post-go-live where your team documents what worked, what failed, and what process changes would accelerate your remaining ROI targets. Capture specific enhancement requests like additional saved searches, workflow modifications, or integration improvements that will compound value over time. Prioritize these optimizations based on financial impact rather than user preference so your next phase of work continues delivering measurable returns.
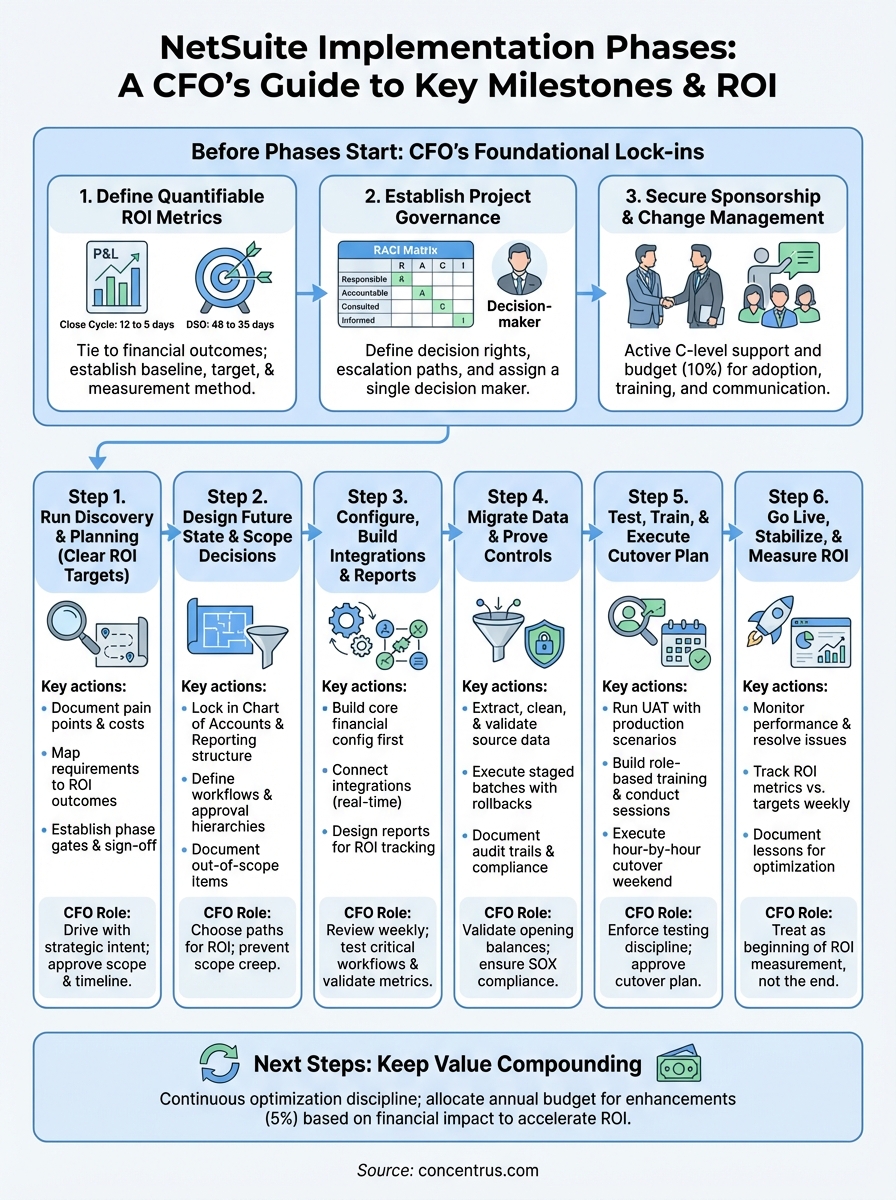
Next steps to keep value compounding
Your NetSuite system will deliver its highest ROI in the months and years after go-live if you treat optimization as a continuous discipline rather than a one-time project. Schedule quarterly reviews where you revisit the ROI metrics you established during the NetSuite implementation phases and identify which workflows still contain manual steps, redundant approvals, or unused automation features. Allocate 5% of your annual ERP budget specifically for enhancements that address the pain points your team documented during stabilization.
Build a prioritized backlog of improvements ranked by financial impact such as automating revenue recognition for new product lines, adding integrations that eliminate data entry, or creating dashboards that surface earlier warning signals for cash flow issues. Most CFOs discover that the second and third waves of optimization deliver higher returns per dollar invested than the initial implementation because your team understands the platform and can implement changes faster.
If your current implementation is underperforming or you need expert guidance to accelerate your ROI timeline, Concentrus specializes in NetSuite implementations and rescue projects designed specifically for finance leaders who demand measurable outcomes at every milestone.